
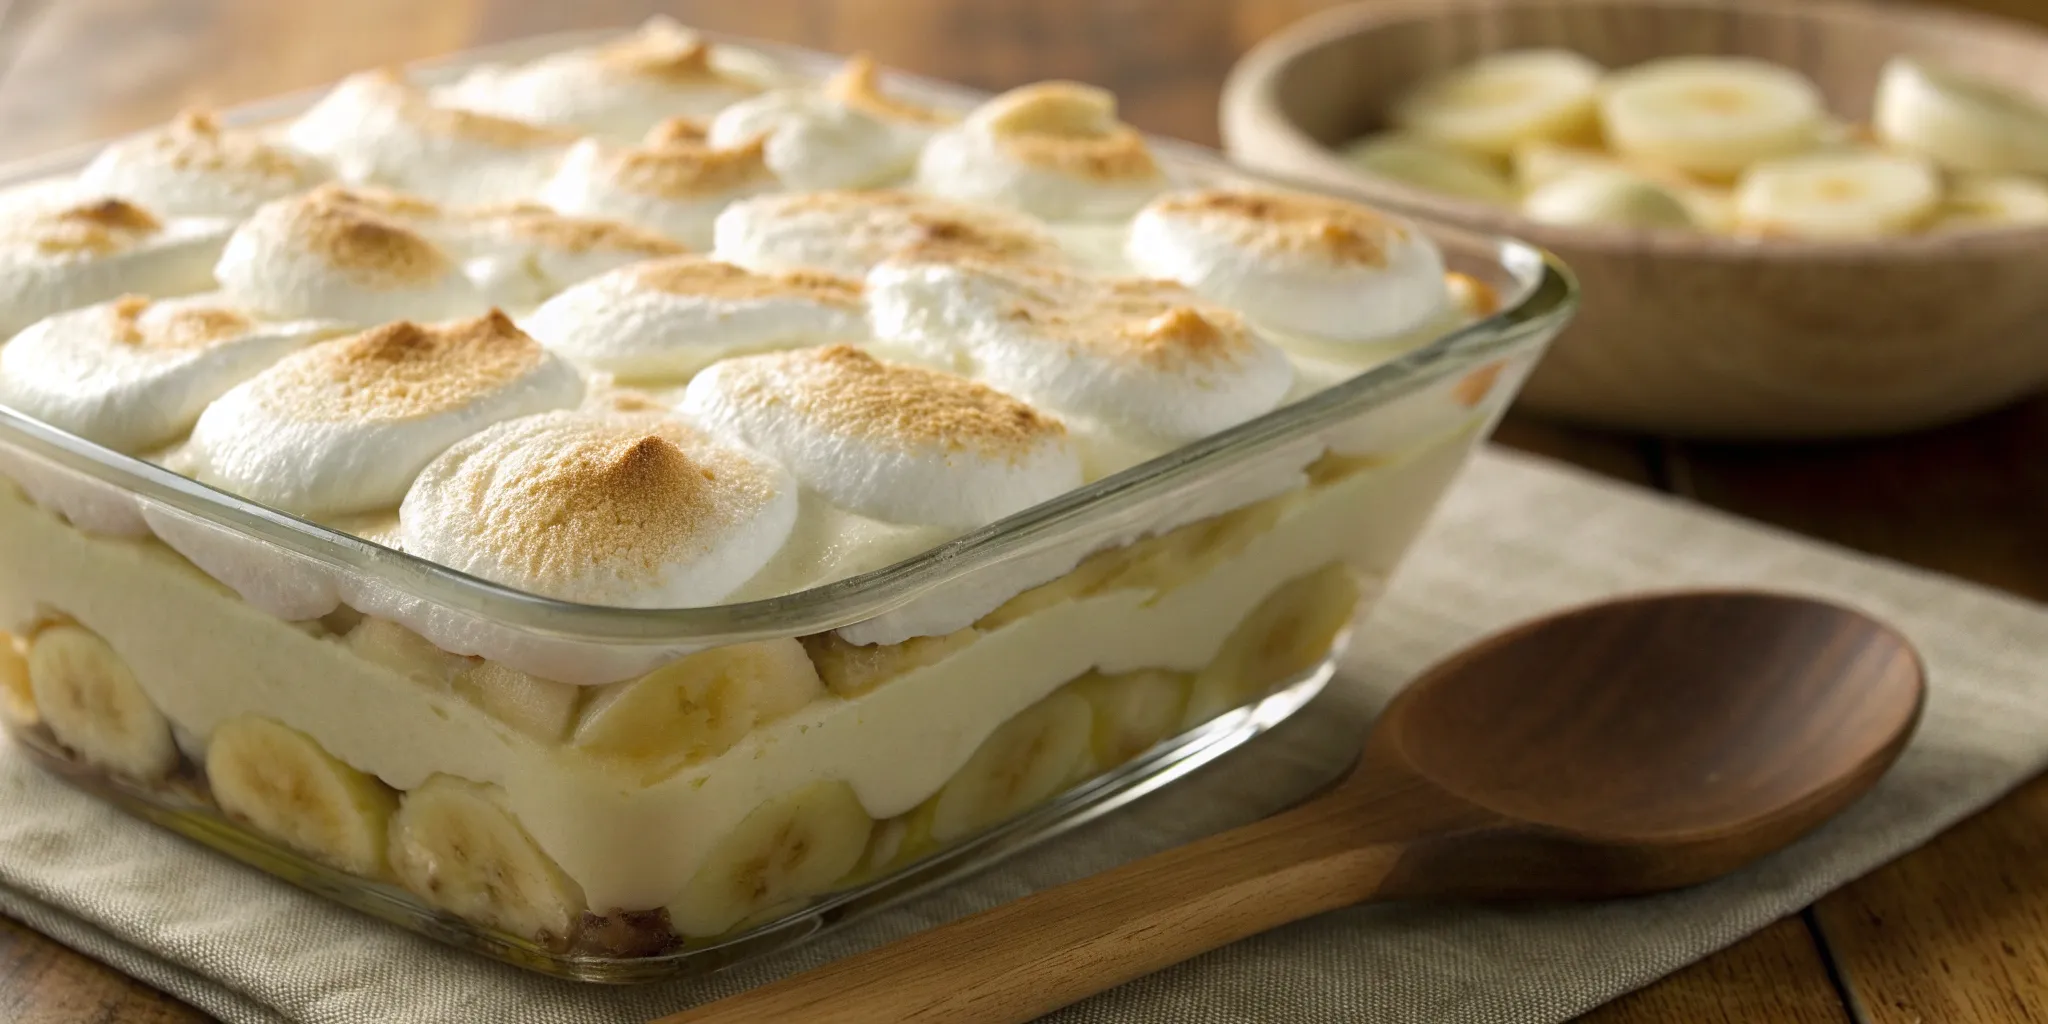
Old Fashioned Banana Pudding with Condensed Milk
We’ve all been there: you follow a recipe for banana pudding, only to end up with a runny custard or bananas that turn brown before you can even serve it. It can feel disappointing, but creating that perfect, scoopable dessert is easier than you think. The solution is to go back to basics with a reliable, time-tested method. An old fashioned banana pudding recipe with condensed milk provides the structure and richness needed for a foolproof result. This guide is here to demystify the process. We’ll cover everything from cooking the custard correctly to layering for the best texture, ensuring your pudding is picture-perfect and delicious.
Key Takeaways
- A From-Scratch Base Is Non-Negotiable: For that authentic, creamy texture, use sweetened condensed milk to create a cooked pudding base. This single step makes the biggest difference in flavor and richness.
- The 4-to-8-Hour Rule Is Key: Assemble your pudding several hours before serving to achieve the perfect texture. This allows the wafers to soften into a cake-like consistency and the flavors to fully develop.
- Keep Bananas Fresh and Firm: Choose bananas that are yellow but still firm to prevent a mushy texture. A quick toss in a little lemon juice before layering will keep them from browning.
What Makes This Banana Pudding Recipe a Classic?
When you think of classic Southern desserts, banana pudding is probably one of the first things that comes to mind. It’s more than just a sweet treat; it’s a staple at family gatherings, church potlucks, and Sunday dinners. While there are plenty of quick-and-easy versions out there, the truly classic recipe—the one that tastes like home—is made from scratch with a rich, cooked pudding. This old-fashioned approach is what makes it so special. It’s not just about the ingredients, but about the love and care that go into creating those perfect, creamy layers. Let's talk about what makes this specific recipe a timeless favorite.
The condensed milk difference
The secret to an incredibly rich and creamy banana pudding is sweetened condensed milk. It’s the game-changer that separates a good pudding from a great one. Unlike recipes that call for instant pudding mix, a homemade pudding with condensed milk is cooked on the stovetop, which allows the flavors to deepen into a velvety, custard-like base. This process creates a satisfying thickness and a sweetness that perfectly complements the fresh bananas. The condensed milk provides a distinct richness that you just can't replicate, making every spoonful feel decadent and comforting. It’s this commitment to from-scratch goodness that makes the dessert so memorable.
Why it's a timeless Southern dessert
Banana pudding has earned its place as a Southern icon for a few simple reasons. First, it’s made for sharing. The recipe is easily scaled up, making it the perfect dessert to bring to a big family dinner or a community get-together—it’s a dish that brings people together. Second, it’s pure nostalgia. The simple, comforting layers of soft vanilla wafers, sweet bananas, and creamy pudding create an old-fashioned dessert experience that reminds so many of us of childhood. It’s a taste of home, a sweet memory served in a bowl, and that’s a feeling that never goes out of style.
Gather Your Ingredients for Perfect Banana Pudding
Before you even pull out a mixing bowl, the secret to an unforgettable banana pudding lies in your ingredients. Getting this part right sets you up for success and ensures every spoonful has that classic, comforting flavor we all love. Let's walk through exactly what you'll need to create the perfect pudding.
Start with a creamy condensed milk base
If you want that truly rich, decadent texture, sweetened condensed milk is your non-negotiable starting point. It’s what gives the pudding its signature velvety smoothness and deep, sweet flavor that perfectly complements the fresh bananas. While some recipes use only regular milk and sugar, the condensed milk creates a luxurious, custard-like base that feels so indulgent. This single ingredient is the foundation for a homemade banana pudding that tastes like it came straight from grandma’s kitchen. It’s the difference between a good banana pudding and a great one.
Pick the best bananas and wafers
The stars of the show are, of course, the bananas and wafers, so choosing wisely is key. Look for bananas that are perfectly ripe—mostly yellow with a few brown speckles. This means they’re sweet but still firm enough to hold their shape when sliced. If they’re too green, they won’t have enough flavor, and if they’re too brown, they’ll turn to mush and create a watery pudding. For the wafers, stick with a classic vanilla cookie that’s sturdy enough to soften without completely dissolving. They provide a wonderful texture and soak up all that creamy pudding goodness, adding a hint of vanilla in every bite.
Check your pantry for these staples
Take a moment to gather your other key players before you begin. For a truly old-fashioned, from-scratch custard, you’ll need egg yolks, whole milk, and a little bit of flour or cornstarch to help it thicken. These simple pantry staples come together to create the pudding base. If you’re looking for a reliable shortcut, an instant vanilla pudding mix can also work wonders and deliver a delicious result with less time spent at the stove. Having everything measured and ready to go makes the entire process feel easy and enjoyable. This classic recipe shows how these simple ingredients create something truly special.
Make Your Banana Pudding: A Step-by-Step Guide
Alright, let's get to the best part: making the pudding. This process is straightforward, but a few key details make all the difference between a good banana pudding and a great one. We'll walk through creating the perfect base, cooking it just right, and choosing the best ingredients to ensure every spoonful is pure comfort. Think of it as building layers of flavor, starting with a rich, creamy foundation. Follow these steps, and you'll have a dessert that tastes like it came straight from a Southern grandma's kitchen.
Mix the creamy pudding base
First things first, let's create that luscious pudding base. In a large bowl, you'll want to whisk together cold milk and an instant vanilla pudding mix. Keep whisking for about two minutes until it starts to thicken up nicely. Once that's combined, pour in the sweetened condensed milk. This is where the magic happens—the condensed milk adds a rich sweetness and an incredibly smooth texture that defines classic banana pudding. Continue to whisk everything together until the mixture is completely smooth and free of lumps. This creamy foundation is what all the other ingredients will build upon.
Cook and cool the pudding correctly
Timing is everything when it comes to banana pudding. While you might be tempted to make it a day ahead, it’s best prepared about four to eight hours before you plan to serve it. This window gives the flavors time to meld together without the bananas turning brown. When you’re cooking the pudding, make sure you give it enough time on the stove to thicken properly. If you pull it off the heat too soon, you might end up with a runny custard. Patience here pays off, ensuring your pudding has that perfect, scoopable consistency that holds up against the wafers and bananas.
Get the perfect pudding consistency
The secret to an amazing banana pudding often comes down to the bananas themselves. You'll want to choose bananas that are ripe enough to be sweet but still firm. Look for bright yellow peels, maybe with a few brown spots, but avoid any that are overly soft or mushy. These perfectly ripe bananas will add the right amount of natural sweetness and hold their shape when layered. Combining the right bananas with a properly cooked pudding base is the key to achieving that delightful texture and authentic flavor that makes this dessert a true Southern classic.
How to Layer Banana Pudding for the Best Results
Assembling your banana pudding is where the art comes in. It’s more than just throwing ingredients in a dish; proper layering is the key to creating that perfect texture and flavor in every single bite. It ensures the wafers soften just enough and the bananas infuse the pudding, so every spoonful is a balanced mix of creamy, sweet, and crunchy. If you've ever wondered how to get that picture-perfect result, it all comes down to a little patience and technique. Here’s how to get it just right.
Follow the classic layering technique
Start with a layer of sliced bananas at the bottom of your dish. Then, spoon over about a third of your creamy, homemade pudding, and top that with a single layer of vanilla wafers. Repeat this sequence two more times to build those delicious layers. For a beautiful finish, instead of covering the entire top with wafers, try tucking them vertically around the edges of the dish. This little trick makes for a stunning presentation and ensures the wafers get just the right amount of softness without turning to mush. It's a simple method that delivers that classic banana pudding experience.
Ensure great flavor in every scoop
The real magic of an unforgettable banana pudding happens before you even start layering. Cooking your pudding on the stovetop is a non-negotiable step for achieving that deep, rich flavor. This process allows the vanilla and condensed milk to meld into a beautifully cohesive base. When you layer this warm, luscious pudding with cool, fresh bananas and crisp wafers, you create a dessert where every component shines. This thoughtful assembly ensures each spoonful has the perfect balance of creamy, fruity, and crunchy textures, creating that satisfying, homemade taste that reminds you of home.
Assemble at the right time for the best texture
Timing is everything when it comes to banana pudding perfection. While you can technically make it a day ahead, you'll get the best results if you assemble it about four to eight hours before serving. This window is the sweet spot. It gives the flavors enough time to get acquainted and for the wafers to soften slightly, but not so long that the bananas start to brown or the wafers dissolve completely. Preparing it fresh on the day of serving guarantees that ideal texture everyone craves—creamy pudding, firm bananas, and wafers that still have a little bite. This simple step makes a huge difference in the final quality of your dessert.
How to Keep Your Bananas from Turning Brown
There's nothing more disappointing than making a beautiful banana pudding, only to see those bright yellow slices turn a sad shade of brown before you even serve it. We've all been there. That browning is a natural process called enzymatic browning, but it can definitely take away from the dessert's appeal. The good news is that keeping your bananas fresh and vibrant is totally doable with a few simple strategies. It all comes down to timing your assembly, using a little kitchen magic, and starting with the right kind of bananas in the first place. Think of it as protecting the heart of the dessert. By paying attention to these details, you can make sure your pudding looks just as good as it tastes, from the first scoop to the last. Let's walk through how to get it right every time, so your banana pudding is always picture-perfect.
Time your prep just right
When it comes to banana pudding, timing is your best friend. While it might be tempting to get it all done the day before, the sweet spot for assembly is about four to eight hours before you plan to serve it. This window is perfect because it gives the Nilla wafers enough time to soften into a cake-like texture and allows all the flavors—the creamy pudding, sweet bananas, and vanilla cookies—to meld together beautifully. Waiting any longer is when you risk the bananas starting to brown. Making it fresh on the day of ensures that every spoonful has that perfect texture and bright, fresh banana flavor that makes this dessert a true Southern classic.
Use natural tricks to keep bananas fresh
A little bit of acid goes a long way in keeping bananas from browning. Before you layer them in your pudding, gently toss the banana slices with a tiny bit of lemon or pineapple juice. You don't need much—just a light coating will do the trick. The citric acid helps slow down the oxidation process that causes the browning. Don't worry about the taste; the small amount of juice won't overpower the classic banana pudding flavor. In fact, a hint of citrus can add a lovely, subtle brightness that complements the sweetness of the pudding and bananas perfectly. It's a simple, old-school trick that works like a charm every single time.
Layer smart for lasting freshness
The secret to beautiful, long-lasting banana layers starts at the grocery store. You want to choose bananas that are perfectly ripe—yellow with maybe a few tiny brown specks, but definitely not covered in them. Over-ripe bananas are great for banana bread, but for pudding, they're too soft and will turn brown and mushy almost instantly. Perfectly ripe bananas are still firm enough to hold their shape between the layers of pudding and wafers. This structure is key to a pudding that not only looks great but also has a wonderful texture. Starting with the right fruit is half the battle won, ensuring your dessert is delicious from the inside out.
Avoid These Common Banana Pudding Mistakes
Even the most experienced Southern cooks can hit a snag when making banana pudding. It’s a straightforward dessert, but a few small missteps can make a big difference in the final result. Let’s walk through the most common pitfalls so you can get that perfect, creamy pudding every single time. Avoiding these is easier than you think, and it's the secret to a dessert that tastes just like the one you'll find on our menu.
Incorrect cooking or stirring
The heart of a great banana pudding is a thick, luscious custard. If yours turns out thin or runny, the culprit is usually the cooking process. It’s tempting to rush this step, but patience is key. You need to cook the mixture long enough and at the right temperature to allow the eggs and cornstarch to work their magic and thicken everything up. Keep your whisk moving constantly to prevent scorching on the bottom of the pan, and don't pull it off the heat until it's properly thickened. A well-made old-fashioned pudding has a texture that’s absolutely worth the wait.
Using the wrong ingredients
A quick trip to the grocery store can go wrong if you grab the wrong can from the baking aisle. Make sure you’re using sweetened condensed milk, not evaporated milk. They look similar, but they are not interchangeable in this recipe. Evaporated milk lacks the sugar needed for sweetness and the thick consistency that helps the pudding set. Using it will result in a bland, watery dessert. And while instant pudding mixes are convenient, they just can't replicate the rich, homemade flavor of a from-scratch custard. Stick to the real deal for the best banana pudding you've ever had.
Assembling too early or too late
Timing is everything when you’re putting your banana pudding together. If you assemble it too far in advance, you risk the bananas turning brown and the wafers becoming complete mush. On the other hand, if you serve it right away, the flavors won't have enough time to meld together. The sweet spot is about four to eight hours before you plan to serve it. This gives the wafers time to soften perfectly without dissolving. If you absolutely must make it the day before, you can toss your banana slices in a tiny bit of lemon juice to help prevent browning.
How Long Should You Chill Banana Pudding?
Patience is probably the hardest ingredient in any banana pudding recipe. Once you’ve layered that creamy pudding, sweet bananas, and crisp vanilla wafers, the temptation to dig right in is real. But the magic of a truly great banana pudding happens in the fridge. Chilling isn't just about making it cold; it's a crucial step that transforms the dessert from a collection of ingredients into a unified, flavorful masterpiece.
This resting period allows the vanilla wafers to soften into a cake-like texture and the flavors to meld together beautifully. Skipping this step will leave you with a pudding that’s runny and disjointed. So, how long is long enough? While a few hours will do in a pinch, giving it the right amount of time to set will make all the difference. If you’re short on time but craving that classic Southern taste, you can always order a perfectly chilled serving from our kitchen to yours.
Chill for the best flavor
For the absolute best texture and taste, you should plan to chill your banana pudding for at least four hours, but overnight is even better. Some experts even recommend a full 24 hours to let the flavors meld and the pudding set completely. During this time, the wafers absorb moisture from the pudding, becoming tender and delicious. The banana flavor also infuses the entire dish, creating that signature taste we all love. Think of it like letting a good chili simmer—the longer it sits, the better it gets. Rushing the process is the quickest way to a soupy, crunchy pudding, and nobody wants that.
Store leftovers the right way
If you’re lucky enough to have leftovers, storing them correctly is key to enjoying them for another day or two. The best method for proper storage is to cover the dish tightly with plastic wrap, pressing it directly onto the surface of the pudding. This helps prevent a skin from forming and keeps the pudding from absorbing any other odors from your refrigerator. Stored this way, your banana pudding will stay fresh for up to three days. The bananas might brown a little more over time, but the flavor will still be fantastic.
Serve and garnish your pudding
When you’re ready to serve, bring the chilled dish straight from the fridge to the table. A classic banana pudding is a beautiful dessert on its own, but a few finishing touches can make it extra special. A generous dollop of fresh whipped cream or a crumble of extra vanilla wafers on top adds a lovely texture. For a truly traditional Southern presentation, you can arrange fresh banana slices over the top just before serving. Whether you keep it simple or dress it up, serving it cold is non-negotiable. Come visit us at Notch8 to see how we serve our classic banana pudding.
Want to Get Creative? Try These Variations
A classic banana pudding recipe is a thing of beauty, and honestly, it doesn't need much fussing. It’s a staple at our family gatherings for a reason. But sometimes, you just want to play in the kitchen and put your own little spin on a favorite. The great thing about banana pudding is that its simple, creamy foundation is perfect for experimentation. Whether you want to introduce a new flavor, switch up the texture, or accommodate a dietary need, there are plenty of ways to make this dessert your own without losing that comforting soul it’s known for.
Think of the classic recipe as your starting point. From there, you can add a pinch of spice, swap a cookie, or try a different kind of pudding base. There are so many delicious ways to make banana pudding, and finding your signature version is part of the fun. Don't be afraid to try something new—the worst that can happen is you have a slightly different (but probably still tasty) dessert. The best that can happen is you discover a new family-favorite twist that gets requested for years to come. It's all about making it feel personal. Maybe you add a splash of bourbon for a grown-up version or a layer of salted caramel for a sweet and savory kick. The possibilities are truly endless, and it's a great way to get creative with a dessert everyone already loves. Let’s get into a few simple ideas to get you started.
Easy flavor swaps and add-ins
If you want to add a little warmth, try mixing a pinch of cinnamon or cardamom into your pudding base. For a richer, tangier flavor profile, you can beat a block of softened cream cheese into the condensed milk mixture before folding in the whipped topping. This creates a decadent, cheesecake-like layer that’s absolutely incredible. You can also experiment with the cookies. While Nilla Wafers are the go-to, shortbread cookies offer a buttery crunch, and chessmen cookies add a touch of elegance. For a completely different vibe, try crushed Biscoff cookies for a spiced caramel note that pairs beautifully with banana.
Ideas for dietary substitutions
Making banana pudding for folks with different dietary needs is totally doable. For a gluten-free version, simply swap the Nilla Wafers for your favorite gluten-free vanilla or shortbread-style cookies. You can also find dairy-free condensed milk, whipped topping, and milk alternatives at most grocery stores these days to create a dairy-free pudding. One of the biggest questions isn't about substitutions, but about keeping those bananas from browning. The best trick is to make it ahead of time by just a few hours. If you need more of a buffer, you can gently toss the banana slices in a tiny bit of lemon or pineapple juice to keep them looking fresh and bright.
Related Articles
Frequently Asked Questions
My pudding turned out runny. What did I do wrong? A runny pudding is almost always a sign that the custard wasn't cooked long enough on the stovetop. It’s tempting to pull it off the heat as soon as it starts to look thick, but it needs a little more time for the eggs and flour or cornstarch to fully activate. Keep whisking over medium-low heat until it’s genuinely thick, like a true pudding. A little patience at the stove makes all the difference.
Can I really use sweetened condensed milk and evaporated milk interchangeably? Definitely not. While they sit next to each other in the baking aisle, they play very different roles. Sweetened condensed milk is thick and full of sugar, which gives the pudding its signature rich sweetness and creamy texture. Evaporated milk is unsweetened and much thinner, so using it by mistake will leave you with a bland and watery result. Always double-check the can to make sure you’ve got the right one.
How far in advance can I make banana pudding? The ideal window for assembling your pudding is about four to eight hours before you plan to serve it. This gives the wafers enough time to soften perfectly and the flavors to meld without the bananas getting too brown or the cookies turning to complete mush. Making it the night before can work in a pinch, but for the best texture, same-day assembly is the way to go.
Is there a way to keep my bananas from browning without using lemon juice? Absolutely. The best defense against brown bananas is starting with the right fruit and timing your assembly well. Choose bananas that are yellow and firm, not the super-ripe, spotty ones you’d use for banana bread. Overripe bananas will turn brown and mushy much faster. Assembling the pudding just a few hours before serving also ensures everything stays fresh and bright without needing any extra ingredients.
Do I have to use Nilla Wafers? While vanilla wafers are the classic choice for a reason, you can certainly get creative here. The most important thing is to choose a cookie that’s sturdy enough to soften without completely disintegrating. Buttery shortbread cookies are a fantastic substitute, and some people love using chessmen cookies for a slightly more elegant version. Feel free to experiment and find a combination you love.