
How to Make Homemade Banana Pudding From Scratch
What separates a decent banana pudding from a truly memorable one? It’s all in the details. It’s the velvety texture of a real custard, not the artificial taste of a powder mix. It’s the way the vanilla wafers soften into a delicate, cake-like layer without turning to mush. And it’s the fresh, sweet flavor of perfectly ripe bananas in every single bite. Achieving this perfection isn’t about luck; it’s about technique. From picking the right bananas to getting the chill time just right, we’ll cover all the small but crucial steps to creating a flawless homemade banana pudding.
Key Takeaways
- A Homemade Custard Makes All the Difference: The secret to an unforgettable banana pudding is a rich, from-scratch vanilla custard. Learning to properly temper your eggs is easier than it sounds and creates a creamy texture and depth of flavor that you just can't get from a box.
- Use Ripe Bananas and Don't Skip the Chill Time: For the best flavor and texture, choose bananas that are yellow with a few brown freckles. Once assembled, let the pudding chill for at least four hours so the wafers can soften into a perfect cake-like layer and the flavors can meld together.
- Perfect Your Presentation with Simple Tricks: Keep your banana slices from browning by tossing them in a little lemon juice before layering. Once you've mastered the classic, make it your own by swapping the cookies or serving it in individual parfait glasses for an elegant touch.
Why Homemade Banana Pudding is Worth the Effort
Let’s be honest: grabbing a box of instant pudding mix from the store is tempting. It’s quick, it’s easy, and it gets the job done. But if you’ve ever had a spoonful of truly homemade banana pudding, you know there’s simply no comparison. Making this dessert from scratch isn’t just about following a recipe; it’s about creating an experience and a flavor that a box mix can’t replicate. It’s the difference between a good dessert and an unforgettable one.
When you take the time to make your own pudding, you control the quality of the ingredients and the richness of the final product. The result is a dessert that’s creamier, more flavorful, and deeply satisfying. It’s a simple way to show a little extra love, whether you’re bringing it to a family get-together or just treating yourself after a long week. If you're ready to taste the difference, it all starts with understanding its roots.
A True Southern Tradition
Banana pudding is more than just a dessert in the South; it’s a cherished tradition. It’s the star of church potlucks, family reunions, and Sunday dinners. The classic recipe is a beautiful harmony of simple ingredients: layers of crisp vanilla wafers, fresh banana slices, and a rich, silky homemade vanilla pudding. Many traditional recipes are also crowned with a fluffy, toasted meringue, adding another layer of texture and flavor. This isn't just about mixing ingredients; it's about assembling a piece of culinary history. Making a traditional Southern Banana Pudding connects you to generations of home cooks who understood the simple joy of a well-made dessert.
Fresh vs. Store-Bought: Does it Matter?
In a word, yes. The difference between a homemade pudding and one from a mix is night and day. A from-scratch pudding base, made with eggs, milk, and sugar, has a depth and creaminess that instant versions just can't match. It’s a comforting, rich flavor that tastes authentic because it is. Plus, making it yourself gives you a huge advantage: the flavors get even better over time. As the pudding chills in the fridge, the vanilla wafers soften to a perfect cake-like consistency, and the banana flavor infuses every layer. This is a dessert that’s fantastic to prepare ahead of time, making it perfect for parties and holiday gatherings.
Gather Your Ingredients
Before you start layering wafers and slicing bananas, let's get all your components ready. A truly great banana pudding is all about the quality of each part, from the fruit to the custard. Making it from scratch means you control every ingredient, ensuring the final product is rich, creamy, and packed with authentic flavor. It’s the kind of dessert that tastes like home, and getting your ingredients in order is the first step toward that comforting, delicious result. Think of it as setting the stage for a show-stopping dessert that will have everyone asking for seconds.
Pick the Perfect Bananas
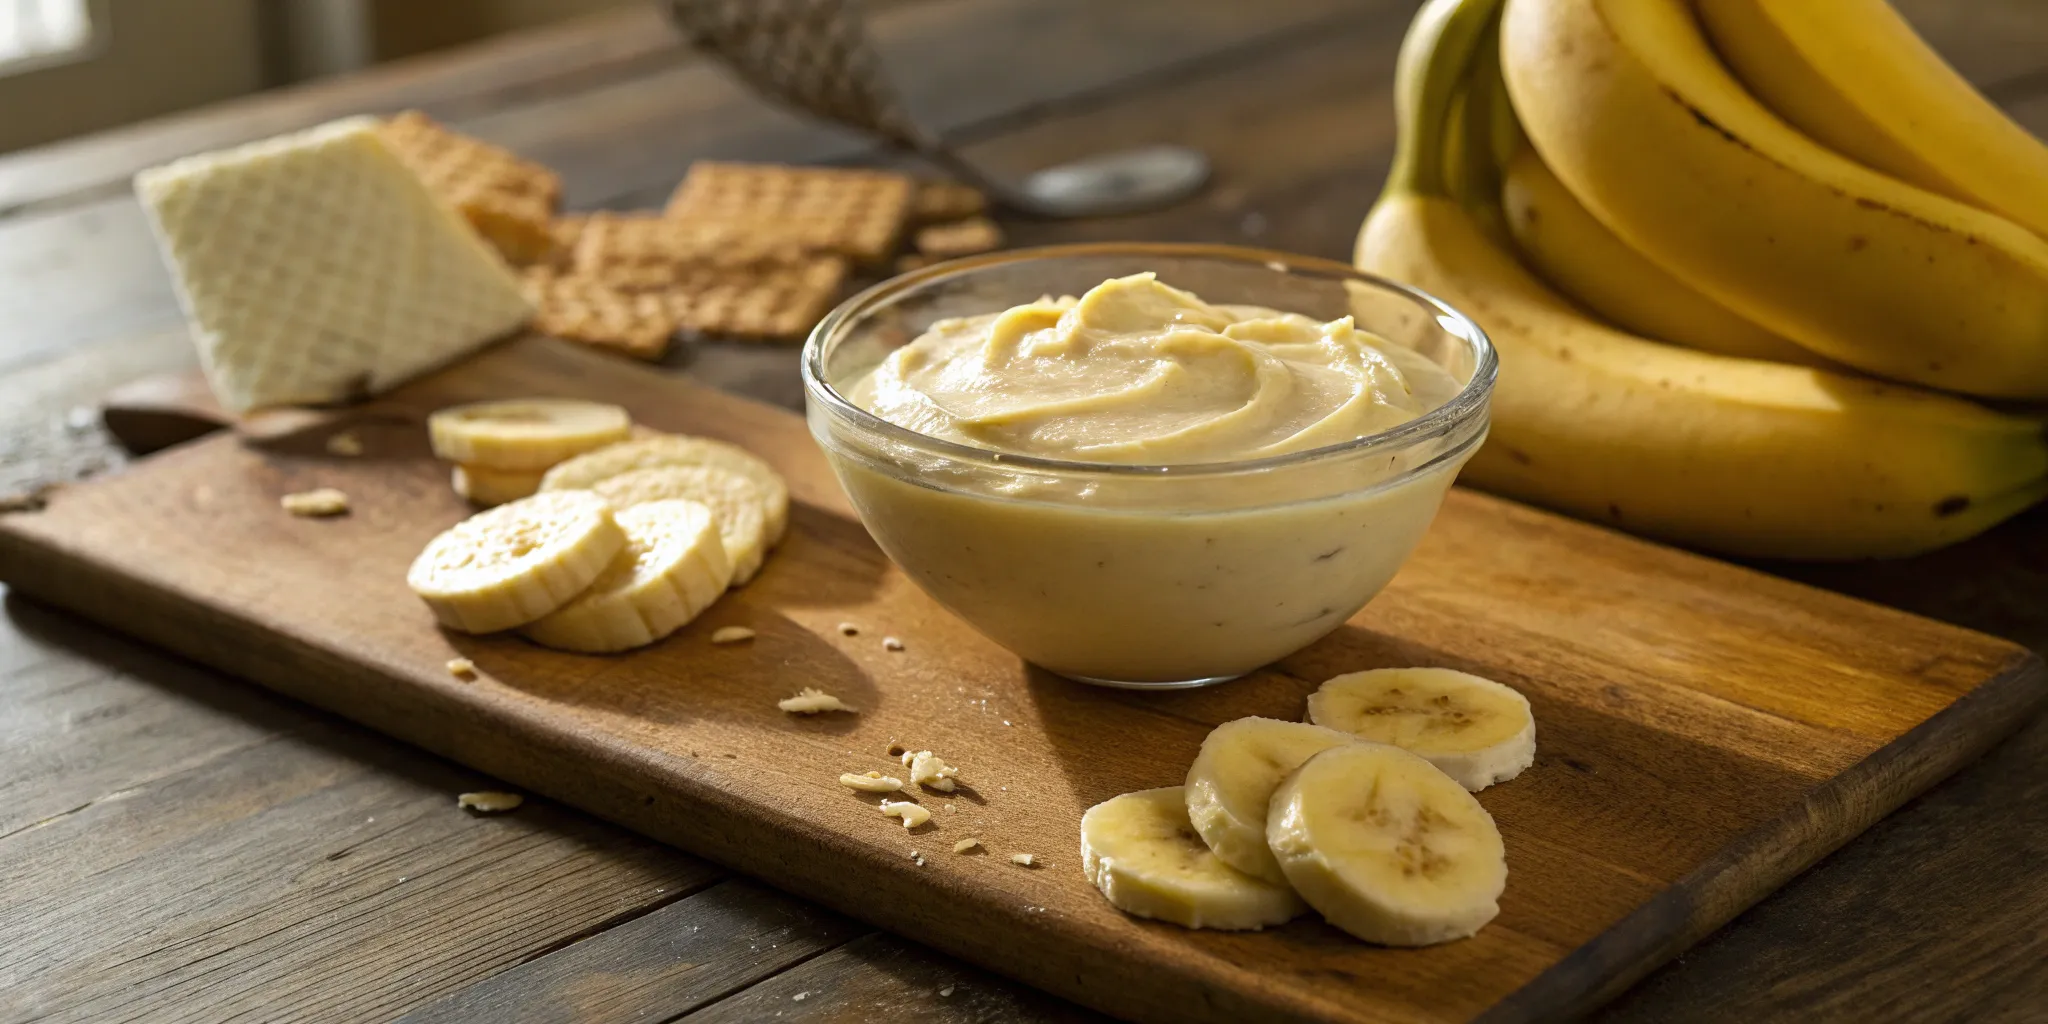
The star of the show deserves some attention! For the best banana pudding, you’ll want to use bananas that are perfectly ripe. Look for bright yellow peels with just a few brown freckles. These bananas are at their peak sweetness and have a firm texture that holds up well when layered. If you use underripe, greenish bananas, your pudding will lack sweetness. On the other hand, bananas that are covered in brown spots are too mushy and can make your dessert watery. This homemade banana pudding guide agrees that finding that sweet spot is key to the perfect flavor and consistency.
Don't Forget the Vanilla Wafers
Vanilla wafers are the backbone of a classic banana pudding, providing structure and a delicate, sweet crunch. As they sit in the creamy pudding, they soften into a delicious, cake-like layer that is absolutely essential. While there are other cookies you could use, nothing beats the original. For that truly authentic, nostalgic taste, stick with Nilla wafers. They are the traditional choice for a reason, providing the perfect flavor and texture to complement the bananas and custard. Many classic recipes, like this Mama's Mississippi Banana Pudding Recipe, wouldn't have it any other way.
Everything for the Pudding Base
This is where the magic really happens. A homemade pudding base is what separates a good banana pudding from a great one. Forget the instant pudding mix; a from-scratch custard is surprisingly simple and tastes a million times better. You’ll need basic pantry staples like whole milk, sugar, egg yolks, a little cornstarch for thickening, and a splash of good vanilla extract. Cooking the custard on the stovetop creates a silky, rich base that’s far superior to anything from a box. This simple homemade vanilla pudding recipe shows just how easy it is to create that creamy foundation.
Choose Your Topping: Whipped Cream or Meringue?
The final flourish on your banana pudding comes down to a classic debate: whipped cream or meringue? A fluffy, toasted meringue is the traditional Southern way to top it off. It creates a light, airy, marshmallow-like crown that gets beautifully golden in the oven. This is often served warm and is pure comfort. Alternatively, a cool, sweet layer of homemade whipped cream offers a rich and creamy finish that’s equally delicious, especially for a chilled pudding. There’s no wrong answer here—it’s all about personal preference. For a truly Southern banana pudding, meringue is the classic choice.
How to Make Homemade Banana Pudding From Scratch
Making banana pudding from scratch might sound like a weekend project, but it’s one of those kitchen skills that pays off in spades. The difference between a pudding made from a box mix and one made with a rich, homemade custard is night and day. It’s what takes this dessert from a simple treat to a show-stopping Southern classic. The process is all about building flavor and texture, one step at a time. We’ll walk through creating a silky pudding base, mastering the art of layering, and ensuring every spoonful is perfectly creamy.
Create a Silky Vanilla Pudding Base
The heart and soul of any great banana pudding is the vanilla pudding itself. This isn't the place for instant mixes; a true, old-fashioned banana pudding from scratch gets its incredible flavor from a homemade custard. You’ll start by gently heating milk, sugar, and a pinch of salt on the stove. In a separate bowl, you'll whisk together egg yolks and a bit of cornstarch, which will act as our thickener. The magic happens when you combine these two mixtures to create a rich, velvety base. This homemade pudding is the creamy foundation that holds the layers of cookies and fresh bananas together, making every bite pure comfort. It’s this step that truly makes the dessert special.
Temper Your Eggs Without Scrambling Them
If you’ve ever worried about making custard, it was probably because of this step. But I promise, tempering eggs is much easier than it sounds. The goal is to gently raise the temperature of your egg yolks so they don’t turn into scrambled eggs when you add them to the hot milk. The key is to go slow. Once your milk mixture is warm, ladle a small amount—about half a cup—into your egg yolk mixture while whisking constantly. This slowly stops the eggs from scrambling by bringing them up to temperature gradually. After you’ve added a cup or so of the hot milk to the yolks, you can confidently pour the warmed egg mixture back into the saucepan with the rest of the milk to finish cooking.
Get That Perfect, Creamy Texture
Now that your eggs are tempered, you’re on the home stretch to a perfectly smooth pudding. Return the saucepan to the stove over medium-low heat and continue to cook, whisking constantly. Don’t walk away! This is where the pudding will thicken. You’re looking for it to become thick enough to coat the back of a spoon. Be patient, as this can take a few minutes. Constant stirring prevents the bottom from scorching and ensures you don’t get any lumps. For an extra guarantee of silkiness, you can pour the finished pudding through a fine-mesh sieve into a clean bowl. This will catch any tiny bits that may have cooked too quickly, leaving you with a flawlessly creamy custard.
The Secret to Perfect Layers
With your pudding made, it’s time for the fun part: assembly. Layering is what transforms the individual components into a true banana pudding. The cookies soften, the bananas release their sweet flavor, and everything melds together. Start with a layer of vanilla wafers in the bottom of your dish—a clear trifle bowl is perfect for showing off your work. Top the cookies with a layer of sliced bananas, then pour over a generous amount of your vanilla pudding. Repeat the process until you run out of ingredients, ending with a final layer of pudding on top. This method ensures you get a perfect combination of cookie, banana, and pudding in every single bite, just like the classic desserts on our Southern menu.
How to Keep Your Bananas Perfectly Yellow
There’s nothing more disappointing than making a beautiful banana pudding, only to see the bananas turn a sad shade of brown before you can even serve it. That browning happens because of a natural chemical reaction when the fruit is exposed to air, but the good news is that it’s preventable. With a few simple tricks, you can keep your banana slices looking fresh and perfectly yellow, ensuring your pudding looks as delicious as it tastes. It all comes down to a little bit of acid, smart timing, and proper storage.
The Lemon Juice Trick
This is a classic kitchen hack for a reason: it works. The key is to start with bananas that are just right—bright yellow with maybe a few tiny brown specks. Once you’ve sliced them, gently toss the pieces in a small amount of lemon juice. You don’t need much, just a light coating. The citric acid in the lemon juice prevents the oxidation process that causes the fruit to brown. This simple step takes only a minute but makes a huge difference in how your pudding looks, keeping those banana layers vibrant and appealing for hours.
Why Timing Your Assembly Matters
When you put your banana pudding together can make or break the appearance of your bananas. For the best results, I recommend assembling the pudding four to eight hours before you plan to serve it. This gives the flavors time to meld together beautifully. However, if your top priority is keeping the bananas perfectly firm and yellow, consider adding the banana slices right before you serve it. Layering them in at the last minute ensures they have minimal exposure to air, which helps them maintain their color and texture, giving your dessert that fresh-from-the-kitchen look every time.
Proper Storage is Key
If you’re lucky enough to have leftovers, you can store your banana pudding in an airtight container in the refrigerator for up to three days. Just know that even with the lemon juice trick, the bananas will naturally soften and darken a bit over time. One thing you should never do is freeze your banana pudding. The freezing and thawing process completely changes the texture of the bananas, turning them mushy and watery. To enjoy your pudding at its best, stick to the fridge and plan to finish it within a couple of days.
How Long Does It Really Take to Make?
Let’s be real: homemade banana pudding isn’t an instant dessert. But the good news is that most of the time involved is completely hands-off. This isn't a recipe that requires you to be chained to the stove for hours. Instead, it’s about smart timing and letting the refrigerator do most of the heavy lifting. Planning ahead is your best friend here, so let's break down the timeline for creating this classic Southern treat from start to finish. When you know what to expect, the whole process feels easy, relaxed, and totally worth the wait. And if you're ever short on time, you can always swing by Notch8 for a taste of authentic Southern comfort without the wait.
Breaking Down the Prep Time
From start to finish, you should plan for about an hour of active time in the kitchen. This includes gathering your ingredients, making the pudding, and layering everything together. You can expect to spend about 15 minutes getting everything measured and ready to go. The actual cooking of the vanilla pudding on the stovetop takes another 15 to 20 minutes of focused attention. The final assembly—layering the vanilla wafers, sliced bananas, and creamy pudding—is the fun part and takes just a few more minutes. It’s a manageable project for a quiet afternoon, and many banana pudding recipes follow this simple timeline.
Why Chilling is a Must
This is the step you absolutely cannot skip. Chilling does more than just make the pudding cold—it’s where the magic happens. This crucial rest period allows all the distinct flavors to meld together into one perfectly sweet and comforting dessert. More importantly, it gives the vanilla wafers time to soften, transforming them from crunchy cookies into a tender, cake-like layer that soaks up all that creamy pudding goodness. For the best results, you’ll want to cover your pudding and let it chill for at least four hours, but letting it sit overnight is even better. This patience pays off with the perfect texture and flavor.
Tips for Making It Ahead
If you're planning for a family dinner or a get-together, you can absolutely get a head start on your banana pudding. The pudding base itself can be made a day or two in advance; just store it in an airtight container in the fridge. You can even fully assemble the entire dessert with the wafers and bananas, then cover it tightly with plastic wrap and let it chill. The only thing you should wait to do is add the topping. Whether you’re using a fluffy meringue or fresh whipped cream, you’ll want to add it just before serving to make sure it’s fresh and has the perfect texture.
Mistakes to Avoid for Perfect Pudding
Making banana pudding from scratch is a labor of love, and getting it just right is so satisfying. While the process is straightforward, a few common missteps can stand between you and pudding perfection. Don't worry, though—I'm here to walk you through them. By sidestepping these simple mistakes, you'll ensure your dessert comes out creamy, dreamy, and delicious every single time, just like the kind you'd find in a classic Southern kitchen like ours here at Notch8.
Don't Use Overripe Bananas
It might be tempting to use those brown, spotty bananas sitting on your counter, but please resist! While they're great for banana bread, overly ripe bananas can make your pudding mushy and give it an almost fermented, overly sweet flavor. For the best texture and taste, you want to use bananas that are perfectly ripe—bright yellow with just a few brown freckles. These bananas are firm enough to hold their shape when sliced and have the ideal sweetness to complement the creamy vanilla pudding without overpowering it. Getting the right level of ripeness is a small detail that makes a huge difference.
Avoid Scrambled Eggs in Your Pudding
Nothing is more disappointing than finding little bits of cooked egg in your smooth, creamy pudding. This happens when the hot milk mixture cooks the eggs too quickly. The secret to avoiding this is a simple technique called tempering. Before you combine everything, whisk your egg yolks in a separate bowl. Then, very slowly, drizzle about a cup of the hot milk mixture into the eggs while whisking constantly. This gently raises their temperature. Once they're warmed up, you can confidently pour the egg mixture back into the pot with the rest of the milk. Properly tempering your eggs is the key to a silky-smooth finish every time.
Make Sure Your Pudding is Cooked Through
Patience is a virtue, especially when you're waiting for your pudding to thicken on the stove. If you pull it off the heat too soon, you'll end up with a runny pudding that never quite sets, no matter how long it chills. You're looking for the mixture to be thick enough to coat the back of a spoon. A great way to test this is to dip a spoon in, pull it out, and run your finger across the back. If the line holds its shape without the pudding running back together, it's ready. Remember, it will continue to thicken as it cools, so you don't need it to be as thick as the final product while it's still on the heat. Achieving that perfect consistency is all about watching for that visual cue.
Don't Skip the Cooling Step
I know it's hard to wait, but the chilling process is absolutely essential. This is where the real magic happens! Chilling your assembled banana pudding for at least four hours (or even better, overnight) does more than just make it cold. This time in the fridge allows the vanilla wafers to soften into a delicate, cake-like layer and gives all the flavors a chance to meld together into the classic dessert we all love. To prevent a skin from forming on top, press a piece of plastic wrap directly onto the surface of the pudding before you put it in the fridge. Trust me, this crucial step is what transforms good banana pudding into an unforgettable one.
How to Make It Your Own
One of the best things about a classic recipe is using it as a starting point for your own creative ideas. While traditional banana pudding is perfect as is, don't be afraid to play with the ingredients and presentation to create a version that’s uniquely yours. A few simple swaps or additions can transform this beloved dessert into a signature treat that will have everyone asking for the recipe. Whether you’re a chocolate lover, a fan of different textures, or just want to serve something with a little extra flair, there are plenty of ways to personalize your pudding. Here are a few of our favorite ideas to get you started.
Add a Little Chocolate
For all the chocolate lovers out there, this one's for you. Adding a bit of chocolate can introduce a rich, decadent flavor that pairs beautifully with the sweet bananas and creamy pudding. You can sprinkle mini chocolate chips between the layers, grate a high-quality dark chocolate bar over the top, or even drizzle it with a chocolate or caramel sauce before serving. For a more integrated flavor, you can experiment with other extracts like caramel or even a splash of brandy in the pudding base to give it a sophisticated twist.
Try a Banana Pudding Cake or Pie
Why stop at pudding? You can easily transform this dessert into a show-stopping cake or pie. For a banana pudding pie, simply layer all the classic ingredients—pudding, sliced bananas, and cookies—inside a pre-baked pie crust. Let it chill until firm, then top with whipped cream. To make a banana pudding cake, bake your favorite yellow or butter cake, let it cool, and then use the chilled pudding as a delicious, creamy frosting or filling between cake layers. It’s a fantastic way to serve this classic flavor profile in a new and exciting format.
Experiment with Different Cookies
While Nilla wafers are the go-to for classic banana pudding, switching up the cookie is one of the easiest ways to make the recipe your own. The cookie layer adds both flavor and texture, so a simple swap can make a big difference. Instead of vanilla wafers, try using buttery shortbread cookies, which will create a richer, melt-in-your-mouth texture. You could also use Chessman cookies for an elegant, buttery crunch. Even gingersnaps could work if you want to add a little spice. Feel free to try your favorite store-bought cookie—you might just discover a new family favorite.
Serve it Up in Style: Parfaits
For a beautiful presentation that’s perfect for parties or special dinners, try serving your banana pudding in individual glasses or jars. Assembling the dessert as parfaits is not only visually appealing but also makes serving a breeze. Simply assemble the layers of cookies, bananas, and pudding in clear glasses, then cover and chill them until you’re ready to serve. Just before bringing them to the table, top each parfait with a dollop of whipped cream and a cookie for garnish. It’s an elegant touch that makes this humble dessert feel extra special.
Storing and Serving Your Masterpiece
You’ve assembled your beautiful banana pudding, and the finish line is in sight. But these last few steps are what separate a good banana pudding from a great one. How you store and serve it makes all the difference, ensuring every spoonful is as delicious as you intended. It’s all about letting the flavors get to know each other and presenting your creation in a way that does it justice. After all your hard work, you deserve a show-stopping dessert that tastes even better than it looks.
The Right Way to Refrigerate It
Patience is the final ingredient in this recipe. Once you’ve layered all your components, cover the dish tightly with plastic wrap, pressing it gently against the surface of the pudding to prevent a skin from forming. Pop it in the refrigerator and let it chill for at least four hours, though eight is even better. This isn't just about getting it cold; this is crucial resting time. The vanilla wafers will soften into a cake-like texture, and the pudding, bananas, and cream will meld into the classic, comforting flavor you’re aiming for. Don't rush this step!
How Long Does It Last?
Ideally, you’ll serve your banana pudding the day you make it, after it’s had plenty of time to chill. If you have leftovers, you can keep them covered in the fridge for up to three days. Just be prepared for some cosmetic changes. The bananas will naturally continue to soften and darken a bit over time, but the pudding will still be perfectly delicious. Some people (myself included) even enjoy the texture on day two, when everything has had even more time to meld. Think of it as a dessert that just gets cozier with time.
Simple Tips for a Beautiful Presentation
You eat with your eyes first, so let’s make sure your pudding looks incredible. To keep your banana slices from browning, gently toss them in a little lemon juice before layering them in the dish—the acidity helps prevent oxidation without affecting the taste. If you topped your pudding with meringue, you can use a small kitchen torch to get that beautiful, golden-brown finish you see in restaurants. For a final touch, serve it in a glass trifle bowl to show off those gorgeous layers or portion it into individual parfait glasses for a more elegant feel. It’s a classic that deserves a spot on any Southern menu.
Related Articles
- The Best Old Fashioned Banana Pudding with Condensed Milk — Notch8 Carolina Kitchen
- 15 Classic Comfort Food Recipes to Make Tonight — Notch8 Carolina Kitchen
Frequently Asked Questions
Do I really have to make the pudding from scratch? Can't I just use a box mix? You certainly can use a box mix if you're in a pinch, but the reason we champion the from-scratch method is the incredible difference in flavor and texture. A homemade custard base made with eggs and milk has a rich, creamy quality that instant pudding just can't replicate. It’s that authentic, comforting taste that makes this dessert a Southern classic, and it's worth the extra 15 minutes of stovetop time.
My pudding didn't set and came out runny. What went wrong? This is a common issue, and it almost always means the pudding wasn't cooked quite long enough on the stove. It’s important to be patient and keep whisking until the mixture is noticeably thick and coats the back of your spoon. A great way to check is to run your finger through the pudding on the spoon; if the line holds its shape, you're good to go. Remember, it will continue to thicken significantly as it chills.
What's the best way to keep my bananas from turning brown and mushy? The key is to start with bananas that are perfectly ripe—yellow with a few freckles, but not covered in brown spots. Overripe bananas will turn mushy quickly. To prevent browning, gently toss your banana slices in a tiny bit of lemon juice before layering them. The acid stops the oxidation process without affecting the flavor. Also, make sure each layer of bananas is completely covered by pudding, as this protects them from the air.
Can I use a different kind of cookie besides vanilla wafers? Absolutely! While vanilla wafers give banana pudding its traditional taste and texture, experimenting with other cookies is a fantastic way to make the recipe your own. Buttery shortbread cookies create a richer, melt-in-your-mouth layer, while Chessman cookies add an elegant touch. Feel free to try your favorite cookie to see how it changes the dessert's character.
I'm making this for a party. How far in advance can I assemble the whole thing? Banana pudding is the perfect make-ahead dessert. You can fully assemble it a day before you plan to serve it. In fact, an overnight chill is ideal because it gives the cookies the perfect amount of time to soften and allows all the flavors to meld together beautifully. Just hold off on adding the topping—whether it's whipped cream or meringue—until right before you serve to ensure it's fresh.