
How to Make the Best Southern Banana Pudding Recipe
We’ve all been there: you decide to make banana pudding, but the custard turns out runny, the wafers get soggy, and the bananas turn brown almost instantly. It’s a dessert that seems simple on the surface, but the details really matter. Getting that perfect balance of creamy pudding, cake-like cookies, and sweet bananas is an art, but it’s one you can easily master. Forget the boxed mixes and common mistakes. We’re going to walk you through the essential techniques for creating a flawless dessert every time. This is more than just a southern banana pudding recipe; it’s your complete guide to achieving that soul-soothing texture and flavor you crave.
Key Takeaways
- Patience with your custard pays off: For that signature creamy texture, cook your custard low and slow, stirring constantly. Pull it from the heat only when it’s thick enough to coat a spoon to avoid a runny or grainy result.
- Use ripe bananas and let it chill: For the best flavor and texture, choose bananas with brown spots for extra sweetness and always let your pudding rest in the fridge for at least four hours. This step is essential for softening the wafers and letting the flavors come together.
- Pick your topping based on your timeline: Opt for a classic baked meringue for a traditional, warm dessert that requires oven time. If you need a faster, no-bake option, a simple whipped cream topping delivers that beloved flavor with less fuss.
What Makes Southern Banana Pudding So Good?
There are desserts, and then there's Southern banana pudding. It’s one of those dishes that feels like a warm hug on a cool evening. But what is it about this simple, layered dessert that makes it a non-negotiable at family gatherings and a star on any comfort food menu? It’s more than just the ingredients; it’s about the tradition and the specific way those simple components come together to create something truly special. From its deep roots in Southern culture to the specific textures and flavors that define an authentic recipe, let's break down what makes this classic so irresistible.
A Quick History of a Southern Classic
Banana pudding is a deeply rooted and popular dessert in the Southern United States, holding a special place in the heart of South Carolina. For generations, it’s been a staple at just about every kind of get-together you can imagine—from Sunday dinners and church potlucks to summer barbecues and holiday feasts. It’s a dessert that’s passed down through families, with each one having its own slightly different, "secret" version. This history is part of its charm; every spoonful carries a sense of tradition and community, making it much more than just a sweet treat.
The Defining Traits of Authentic Banana Pudding
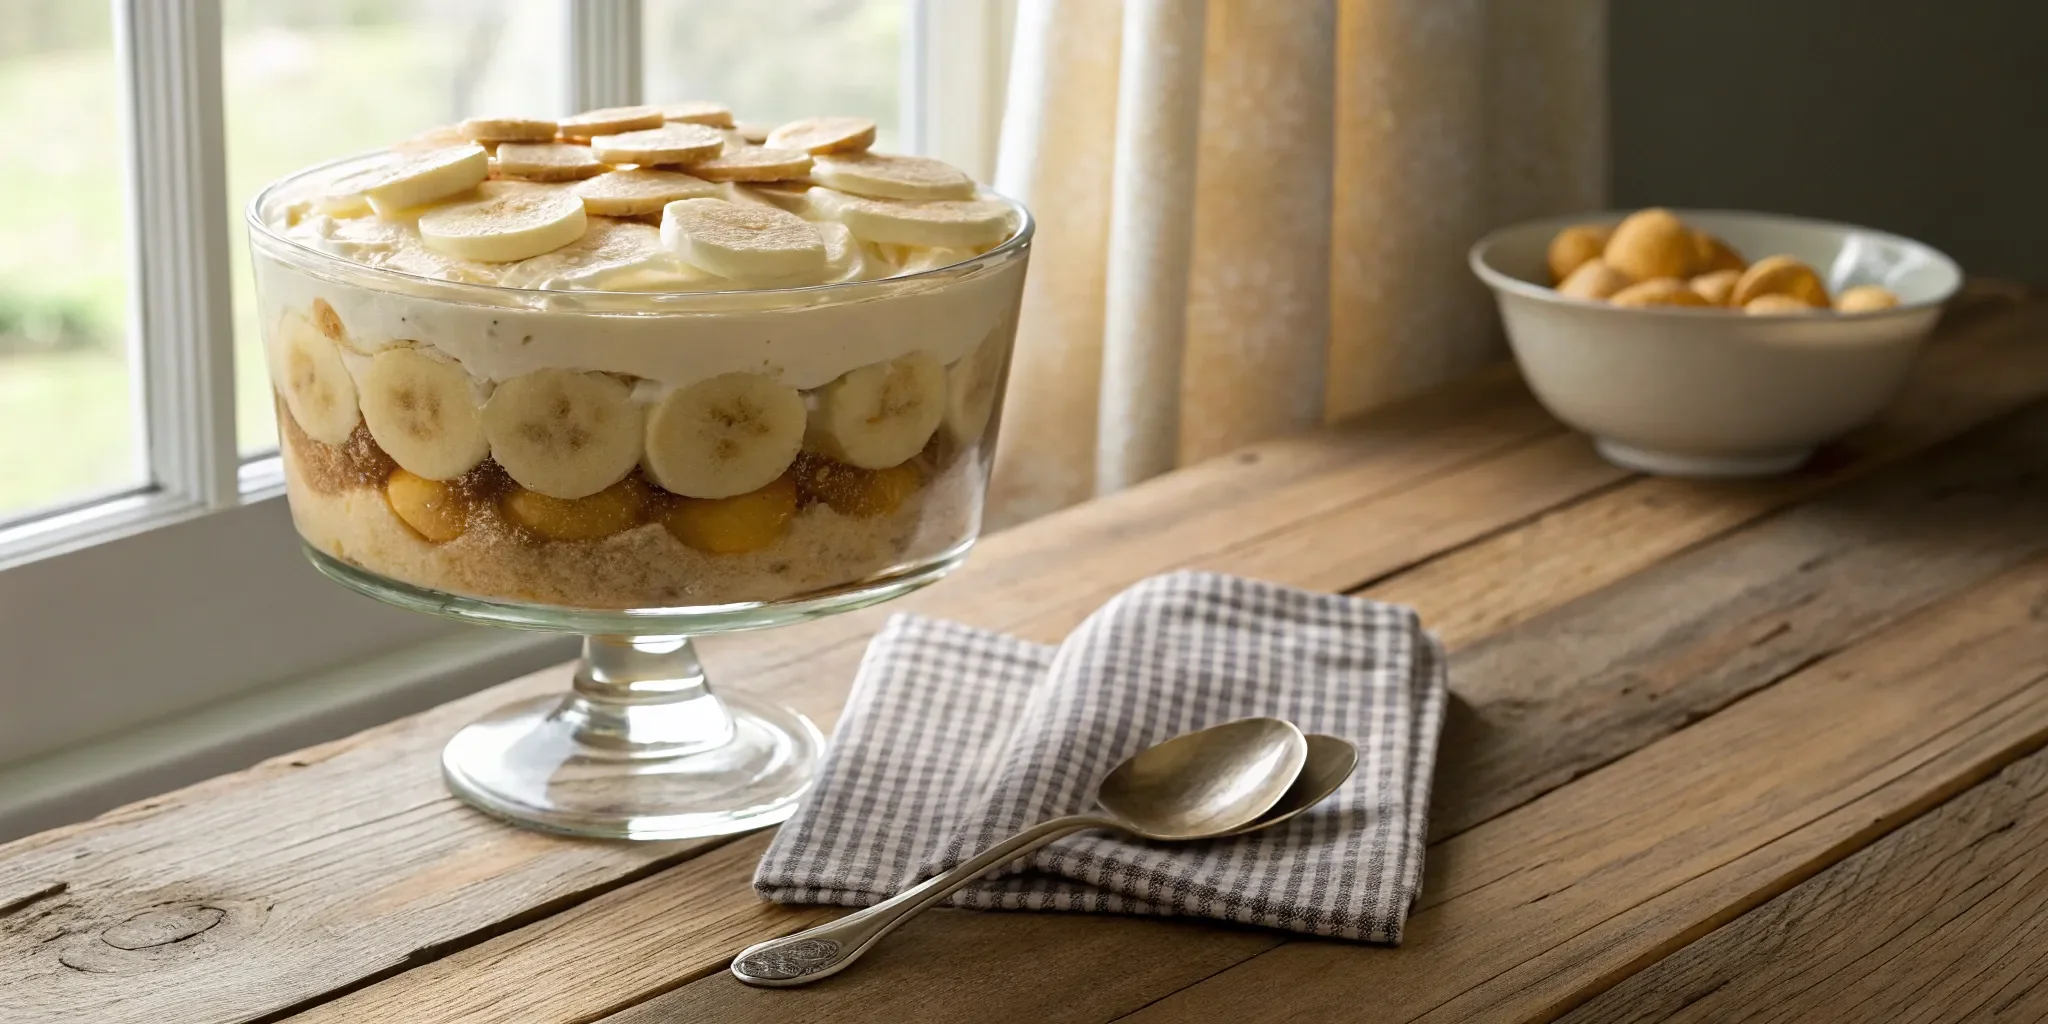
So, what separates a truly great banana pudding from the rest? It all comes down to making it from scratch. An authentic Southern banana pudding features distinct layers of creamy, homemade vanilla custard, classic vanilla wafers, and perfectly ripe, fresh banana slices. Forget the instant pudding mix—the real magic is in a rich, fluffy custard that’s full of classic vanilla and butter flavors. This commitment to real ingredients is what creates that signature taste you just can't get from a box. It’s the kind of dessert we proudly serve on our menu because we know those details make all the difference.
Gather Your Ingredients for Classic Banana Pudding
Before you pull out a single mixing bowl, let's talk about what goes into this classic dessert. The secret to a truly memorable banana pudding isn't a complicated technique—it's starting with quality ingredients. A great pudding strikes the perfect balance of creamy, sweet, and fruity, and that harmony begins with your shopping list. Getting these details right is what separates a good banana pudding from a great one. We’ll break down the fresh items that are non-negotiable and the pantry staples you’ll want to have ready to go. When you’re craving the real deal but don’t have time to make it yourself, you can always find authentic Southern comfort on our menu.
Fresh Ingredients That Make All the Difference
To achieve that rich, authentic flavor, using fresh ingredients is crucial. First, let's talk bananas. You'll want about four to five medium, ripe bananas—not green, but not covered in brown spots either. They should be sweet with a firm texture that holds up during assembly. Next up is the cream cheese. For the best taste and texture, always grab a full-fat block of cream cheese. It adds a special tanginess and decadent creaminess that you just can't get from the whipped or low-fat versions. Along with whole milk and large eggs for the custard, these fresh components form the heart and soul of your pudding.
Pantry Staples to Have on Hand
With your fresh ingredients in the cart, it's time to check the pantry. The crunchy, sweet foundation of any Southern banana pudding is, of course, the vanilla wafers. A classic box of Nilla Wafers is the traditional choice for a reason—they soften to the perfect cake-like consistency without turning to mush. You'll also need the building blocks for your custard: granulated sugar for sweetness, a bit of all-purpose flour or cornstarch to act as a thickener, a pinch of salt to balance the flavors, and a good quality vanilla extract. These simple staples come together to create the creamy homemade vanilla custard that ties everything together.
How to Make Banana Pudding from Scratch: A Step-by-Step Guide
Ready to make a banana pudding that tastes like it came straight from grandma’s kitchen? The secret is in the details. While it’s tempting to use instant pudding mix, a homemade custard gives this dessert its signature rich flavor and velvety texture. Don’t worry, it’s easier than you think! We’ll walk through the three key stages: creating the custard, layering the ingredients, and letting it all chill to perfection. Follow these steps, and you’ll have a classic Southern dessert that’s sure to be a hit.
Step 1: Create the Perfect Homemade Custard
The heart of any great banana pudding is a rich, creamy custard. The key here is patience. As you cook the mixture of egg yolks, sugar, and milk, stir it constantly over medium-low heat. Rushing this part can lead to a runny pudding. You’re looking for the custard to get noticeably thick, enough to coat the back of a spoon. Be careful not to overcook it, which can scramble the eggs and create a grainy texture. Once it’s perfectly thickened, remove it from the heat and stir in your vanilla extract. This step truly makes the dessert something special.
Step 2: Master the Layering Technique
Once your custard is ready, it’s time to assemble. The layering process ensures every spoonful has the perfect combination of cookie, banana, and pudding. Start with a thin layer of custard on the bottom of your dish to keep the first layer of cookies from getting too soggy. Then, add a single layer of vanilla wafers, followed by sliced bananas. Pour a generous amount of your warm custard over the top, making sure to cover everything. Repeat these layers—wafers, bananas, pudding—until you reach the top, always finishing with a final layer of custard.
Step 3: Assemble and Chill Your Pudding
After you’ve layered everything, the final step is to let the pudding chill. This is where the magic happens. To prevent a skin from forming on the custard, gently press a piece of plastic wrap directly onto the surface. For the best results, let the pudding chill in the refrigerator for at least five hours, though overnight is even better. This time allows the Nilla Wafers to soften and gives all the flavors a chance to meld together. It’s a crucial step that transforms the components into the comforting dessert we all know and love.
How to Get the Perfect Banana Pudding Texture
The secret to a truly unforgettable banana pudding isn’t just the flavor—it’s the texture. That perfect harmony of creamy custard, soft-but-not-soggy wafers, and sweet, tender bananas is what makes this dessert a Southern icon. It’s a detail we obsess over in our own Carolina Kitchen, and it’s something you can master at home, too. Getting the texture right is what separates a good banana pudding from a truly soul-soothing one.
It all comes down to managing three key components. First, the custard needs to be flawlessly smooth, without a hint of graininess. Next, the vanilla wafers should soften just enough to be cake-like, but they can’t turn to complete mush. Finally, the bananas themselves have to be at the perfect stage of ripeness to lend their signature sweetness and creamy consistency. It might sound like a delicate balancing act, but with a few simple tips, you can nail each element and create a pudding with a texture that’s pure comfort.
Make a Silky Smooth Custard
The foundation of your pudding is the custard, and its texture can make or break the entire dessert. The goal is a rich, velvety consistency, and the key is patience. Many homemade custards end up too thin because they’re pulled from the heat too soon. You need to cook it low and slow, stirring constantly, until it’s noticeably thick. On the flip side, cooking it too high or for too long can scramble the eggs, leaving you with a grainy texture. Trust your eyes and feel—when the custard coats the back of a spoon and holds its shape, it’s ready. Following a reliable Southern baked banana pudding recipe will give you a great starting point for mastering the technique.
Keep Your Wafers from Getting Soggy
There’s a fine line between a pleasantly softened wafer and a sad, soggy one. To keep your layers distinct and your wafers intact, try this simple trick: once your custard is cooked, press a piece of plastic wrap directly onto its surface before you chill it. This prevents a skin from forming, which is great, but it also stops condensation from building up and dripping onto your layers. This way, the wafers absorb moisture from the custard slowly as the pudding sets, rather than getting hit with extra water. It’s a small step that helps maintain that ideal, cake-like texture for your banana pudding vanilla wafers.
Pick the Ripest Bananas
The bananas you choose have a huge impact on both the flavor and texture of your pudding. This is not the time for perfectly yellow, firm bananas. You want the ones that are past their prime for snacking—the ones covered in brown spots. These overripe bananas are significantly sweeter and have a much softer, creamier texture that melts right into the custard. When you layer them, they contribute moisture and a deep, caramelized sweetness that you just can’t get from less-ripe fruit. This focus on ripeness is part of what makes a Southern-style banana pudding so comforting and delicious.
Meringue vs. Whipped Cream: Which Topping is for You?
The great banana pudding debate often comes down to one final, crucial element: the topping. Are you Team Meringue or Team Whipped Cream? Both are delicious, but they create two very different desserts. One is a baked, classic confection with a light, toasted crown, while the other is a cool, creamy, no-fuss treat. There’s no right or wrong answer here—it all comes down to your personal taste and how much time you have. Let’s break down the pros of each so you can decide which topping is perfect for your pudding.
The Case for Traditional Meringue
If you want the most authentic, old-fashioned banana pudding experience, meringue is your answer. This topping is made from whipped egg whites and sugar, creating a light, airy cloud that sits on top of the custard. When baked, it turns a beautiful golden-brown, offering a wonderful textural contrast to the creamy pudding and soft wafers below. Following a traditional Southern banana pudding recipe with meringue means you’ll need to bake the entire dessert. This extra step is essential for cooking the egg whites safely, and it also helps meld all the flavors together into a warm, comforting classic that tastes just like grandma used to make. It’s the perfect choice for dessert purists.
Why You Might Prefer Whipped Cream
On the other hand, maybe you’re short on time or just don’t want to turn on your oven. In that case, whipped cream is a fantastic choice. Using a whipped cream topping allows you to make a completely no-bake dessert that’s cool, refreshing, and incredibly simple to assemble. It’s the perfect option for a hot day or a last-minute get-together. Many modern takes on quick banana pudding even use instant pudding and a store-bought whipped topping to make things even easier. While it’s not the traditional method, it delivers that classic banana pudding flavor you love without all the fuss, proving that sometimes the easiest way is also one of the most delicious.
Common Banana Pudding Mistakes to Avoid
Making banana pudding is a true labor of love, but a few common slip-ups can stand between you and dessert perfection. Don't worry—they're all easy to fix. Getting that creamy, dreamy texture just right is all about paying attention to the details. Let's walk through how to sidestep the most frequent mistakes so your pudding comes out flawless every single time, just like the kind you'd find in our Notch8 kitchen.
Sidestep Common Custard Errors
The heart of any great banana pudding is a rich, homemade custard. It’s also the place where things most often go wrong. The biggest issue is undercooking the custard; if you pull it from the heat too soon, you’ll end up with a runny pudding. Be patient and wait for it to become noticeably thick—it should generously coat the back of a spoon. On the flip side, overcooking is just as problematic. If the heat is too high, the eggs can scramble, resulting in a grainy texture. The key is to use gentle, consistent heat and stir constantly until it’s just right.
Watch Your Temperatures and Mixing
Temperature control doesn't stop once the custard is cooked. After you remove it from the heat, you need to let it cool properly. To do this without any issues, cover the custard with plastic wrap, pressing it directly onto the surface. This simple trick is the secret to prevent a skin from forming on top, ensuring every spoonful is perfectly smooth and creamy. If your recipe involves tempering eggs, take your time with that step, too. Adding the hot liquid to your eggs too quickly will cook them instantly, so a slow, steady stream while whisking is your best friend.
Fix Layering and Storage Issues
The quality of your ingredients matters, especially the bananas. While you want ripe bananas for sweetness, avoid ones that are overly brown or mushy. For the best results, use bananas that are ripe but still firm. This ensures they hold their shape and don’t turn the pudding into a watery mess. When you assemble your layers, aim for a good balance of custard, wafers, and bananas. Too few wafers and you lose that signature texture; too many and they’ll soak up all the custard. Finally, remember that banana pudding is best enjoyed fresh, within a day or two, before the wafers get too soft and the bananas start to brown.
Fun Variations on Classic Banana Pudding
While nothing beats a classic Southern banana pudding, sometimes it’s fun to mix things up. Whether you’re short on time, catering to different dietary needs, or just feeling creative, the traditional recipe is a fantastic starting point for new ideas. Think of these variations as ways to make this beloved dessert your own. A few simple tweaks can transform the texture and flavor, giving you a new reason to fall in love with banana pudding.
Try a Quick No-Cook Version
If you're pressed for time but still craving that creamy, comforting flavor, a no-cook version is your best friend. The biggest time-saver here is swapping the classic baked meringue for a simple whipped cream topping. This not only cuts out the baking step but also gives the pudding a lighter, airier finish that many people love. You can use store-bought whipped topping for ultimate convenience or whip up your own heavy cream with a little sugar and vanilla. It’s a fantastic shortcut for a last-minute get-together when you need a delicious Southern banana pudding recipe without the wait.
Make It Sugar-Free or Dairy-Free
Dietary restrictions shouldn't stop anyone from enjoying a good banana pudding. You can easily adapt the recipe to be sugar-free by using a sugar substitute in the custard and a sugar-free instant pudding mix as a base. For a dairy-free version, swap the milk for your favorite plant-based alternative like almond or oat milk and use a dairy-free whipped topping. To get that perfectly smooth, creamy texture without the traditional ingredients, try using an immersion blender or even a milk frother to mix your pudding. It ensures everything is well-combined and silky smooth.
Serve in Individual Portions (or Swap the Cookies!)
For a beautiful presentation, especially when serving guests, try assembling your banana pudding in individual portions. Small glass jars, trifle dishes, or even wine glasses make for an elegant and easy-to-serve dessert. This is also a great opportunity to get creative with the layers. Don’t feel tied to vanilla wafers! While they are the classic choice, you can easily swap them out for other cookies. Try using shortbread for a buttery crunch, graham crackers for a s'mores-like flavor, or even crumbled chessmen cookies for a fancier touch. It’s a simple change that adds a personal and unexpected twist.
Pro Tips for Better Flavor and Presentation
Once you’ve mastered the basic banana pudding recipe, you can start playing with it to make it your own. A few simple adjustments to the ingredients or how you serve it can make a huge difference, turning a good dessert into a truly memorable one. Whether you’re looking for a richer flavor or a prettier presentation for your next family get-together, these tips will help you perfect your pudding. Think of them as the finishing touches that show you’ve put extra care into your creation.
Simple Ingredient Swaps for a Big Impact
Sometimes, the secret to a better banana pudding is hiding in your pantry. For a richer, creamier texture with a bit of tang, try using full-fat block cream cheese in your custard. Another great swap is using evaporated milk instead of regular milk; its concentrated sweetness adds a wonderful depth of flavor. Don’t be afraid to experiment with the cookies, either. While vanilla wafers are classic, you can create a unique twist by using graham crackers or even animal crackers for a different texture and taste. These small changes are an easy way to put a personal spin on a beloved Southern recipe.
Ideas for Serving and Presentation
We eat with our eyes first, and a beautiful banana pudding just tastes better. To keep your bananas from browning, make sure they are completely covered by the custard layers. This simple trick keeps them looking fresh and appealing. If your recipe includes cookies on top, add them right before you serve to keep them perfectly crisp. One of the most important steps is patience: let your pudding chill in the refrigerator for at least four hours. This allows all the flavors to meld together beautifully, resulting in a much better taste and texture.
How to Store and Make Banana Pudding Ahead of Time
One of the best things about banana pudding is that it’s a fantastic make-ahead dessert. Whether you’re planning for a family get-together or just want to have a sweet treat ready in the fridge, a little planning goes a long way. Storing it correctly ensures every spoonful is as creamy and delicious as the first. If you're building a whole Southern feast, having the dessert done ahead of time is a huge help, letting you focus on other classic Southern dishes. Here’s what you need to know to keep your pudding perfect.
How Long Does Banana Pudding Last in the Fridge?
Patience is key when it comes to banana pudding. After you’ve assembled all the layers, the pudding needs to chill in the refrigerator for at least four hours. This chilling time is crucial because it allows the vanilla wafers to soften and all the flavors to meld together into that classic taste we all love. Once it’s properly chilled, your banana pudding will stay fresh and delicious for up to three days. This generous window makes it an ideal dessert to prepare a day or two before you plan to serve it, saving you time and stress.
The Right Way to Refrigerate It
To keep your banana pudding from developing a rubbery "skin" on top of the custard, here’s a simple but effective trick. Before you put the whole dish in the fridge, press a piece of plastic wrap directly onto the surface of the pudding. This prevents air from getting to the custard and forming that unwanted layer. Once the surface is covered, wrap the entire dish tightly. Stored this way, your banana pudding will maintain its creamy texture and fresh flavor for up to four days, so you can enjoy every last bite without any compromise in quality.
Related Articles
- The Ultimate Old Fashioned Baked Macaroni and Cheese — Notch8 Carolina Kitchen
- Comfort Foods 101: Everything You Need to Know — Notch8 Carolina Kitchen
Frequently Asked Questions
Can I use instant pudding mix instead of making the custard from scratch? You certainly can if you're in a pinch, but making the custard from scratch is what gives Southern banana pudding its signature rich flavor and velvety texture. The homemade version has a depth that you just can't get from a box. Taking the extra time to cook the custard is what makes the dessert feel truly special and taste like it came from a family recipe book.
How do I keep my bananas from turning brown in the pudding? The key to keeping your bananas looking fresh is to limit their exposure to air. As you build your layers, make sure each slice of banana is completely covered by the warm custard. This creates a barrier that slows down the browning process. While a little discoloration is natural over a couple of days, this simple step will keep your pudding looking its best when you serve it.
My custard came out runny. What went wrong? A runny custard is almost always the result of not cooking it long enough. It can be tempting to pull it off the heat early, but patience is essential. You need to stir it constantly over medium-low heat until it becomes noticeably thick and can coat the back of a spoon. If you rush this step, the custard won't set properly, leading to a soupy pudding.
What's the best dish to make banana pudding in? For a classic presentation that shows off your hard work, a glass trifle bowl is the perfect choice. It allows everyone to see the beautiful, distinct layers of wafers, bananas, and custard. If you're serving a crowd or want a more modern look, assembling the pudding in individual glass jars or cups is a great option that makes serving simple and elegant.
How long does the pudding really need to chill before serving? You should let your banana pudding chill for at least four to five hours, but overnight is even better. This step is about more than just getting the dessert cold. The chilling time allows the vanilla wafers to soften to the perfect cake-like consistency and gives all the flavors a chance to meld together into the comforting dessert you know and love.