
How to Make the Perfect Buttermilk Fried Chicken Sandwich
There’s a reason some fried chicken is unforgettable. It’s not just about a crispy coating; it’s about the incredibly tender, juicy meat inside that’s packed with flavor. The secret isn’t some complicated technique or hard-to-find ingredient. It’s buttermilk. This Southern kitchen staple is the single most important step for creating chicken that’s moist and delicious from the inside out. It tenderizes, it seasons, and it lays the foundation for that perfect, crunchy crust. In this guide, I’ll walk you through every step, from the marinade to the final assembly, to help you master the ultimate comfort food: the perfect buttermilk fried chicken sandwich.
Key Takeaways
- Prioritize the Buttermilk Marinade: For incredibly tender and juicy chicken, marinate it in buttermilk for at least four hours, or preferably overnight. This simple step infuses the meat with flavor and guarantees a perfect texture.
- Master the Crispy Coating: Achieve that perfect crunch by adding cornstarch to your flour mixture and using the double-dredge technique. Remember to season your breading generously for flavor in every single bite.
- Fry with Precision for Perfect Results: Avoid soggy chicken by keeping your oil at a steady 350°F and not overcrowding the pot. Use a meat thermometer to ensure the chicken reaches 165°F, and always drain it on a wire rack instead of paper towels.
Why Buttermilk is the Secret to Perfect Fried Chicken
Ever wonder what makes some fried chicken so tender it practically melts in your mouth, while other pieces are tough and dry? The answer is simpler than you think, and it’s probably sitting in your fridge right now: buttermilk. This classic Southern staple is the undisputed champion when it comes to preparing chicken for frying. It’s the secret weapon that turns a good piece of chicken into an unforgettable one.
So, what makes it so special? Buttermilk works its magic in two powerful ways. First, its gentle acidity tenderizes the meat, breaking down tough proteins to create a supremely juicy texture. Second, it acts as a flavorful brine, infusing the chicken with a subtle tang that perfectly complements the rich, crispy coating. This isn't just about adding flavor on the surface; the marinade works its way deep into the meat. Using a buttermilk marinade is a foundational step that guarantees your fried chicken will be moist and delicious from the inside out. It’s a time-honored technique that we swear by, and once you try it, you’ll understand why it’s the secret to perfect fried chicken every single time.
How Buttermilk Tenderizes Chicken
The magic behind buttermilk's tenderizing power lies in its acidity. Buttermilk contains lactic acid, which is just acidic enough to gently break down the proteins in the chicken without turning the meat mushy. Think of it as a slow, gentle marinade that works to relax the muscle fibers. This process results in a noticeably more tender and succulent piece of chicken after it's cooked. Unlike harsher acidic ingredients like lemon juice or vinegar, buttermilk’s mildness ensures the texture remains perfect, giving you that ideal bite that’s both soft and satisfying.
How Acidity Creates Richer Flavor
Beyond creating a tender texture, buttermilk’s acidity is also key for building deep, savory flavor. It functions much like a brine, helping the chicken retain moisture during the cooking process. This means your chicken won't dry out in the hot oil. The tang from the buttermilk also seasons the meat from within, creating a more complex flavor profile that you can't get from a dry seasoning alone. This internal seasoning ensures every single bite is packed with flavor, not just the crispy coating on the outside. It’s this infusion of flavor that truly sets a buttermilk-fried chicken sandwich apart.
What You'll Need for Your Fried Chicken Sandwich
Before you even think about heating up the oil, let's talk about the building blocks of a truly unforgettable fried chicken sandwich. Getting these four key components right is what separates a good sandwich from a great one. We're talking about the perfect cut of chicken, a tangy buttermilk marinade that works its magic, a breading that crackles with every bite, and the ideal buns and toppings to bring it all home. It’s all about layering flavors and textures, so let’s gather our ingredients and get started.
Pick the Right Cut of Chicken
First things first, let's talk chicken. The cut you choose really sets the stage for the whole sandwich. You have two great options here: boneless, skinless chicken thighs or breasts. If you love super juicy, flavorful meat, thighs are your best friend because their higher fat content keeps them incredibly tender. On the other hand, chicken breasts are a fantastic lean option. You can pound them to an even thickness, which helps them cook quickly and gives you a wonderful texture. There’s no wrong answer, it just comes down to what you prefer in your perfect sandwich.
Mix Your Buttermilk Marinade
Now for the secret weapon: the buttermilk marinade. This step is non-negotiable for achieving that classic Southern flavor and ridiculously juicy chicken. The acidity in the buttermilk works to tenderize the meat, making it melt-in-your-mouth soft. You’ll want to follow a good buttermilk fried chicken sandwich recipe and let your chicken soak for at least an hour, but if you can plan ahead, an overnight marinade is the gold standard. This simple soak is what infuses the chicken with a subtle tang and ensures it stays moist and delicious through the frying process.
Create a Crispy Breading
What’s a fried chicken sandwich without that signature crunch? For that irresistible texture, the chicken should be coated in a crispy breading. The secret lies in dipping the marinated chicken twice in a mixture of seasoned flour and cornstarch before frying. This technique ensures a perfectly crispy exterior that contrasts beautifully with the juicy chicken inside. It’s this double-dip that creates all those extra layers and crags that become golden and crunchy when you fry them up.
Select Your Buns and Toppings
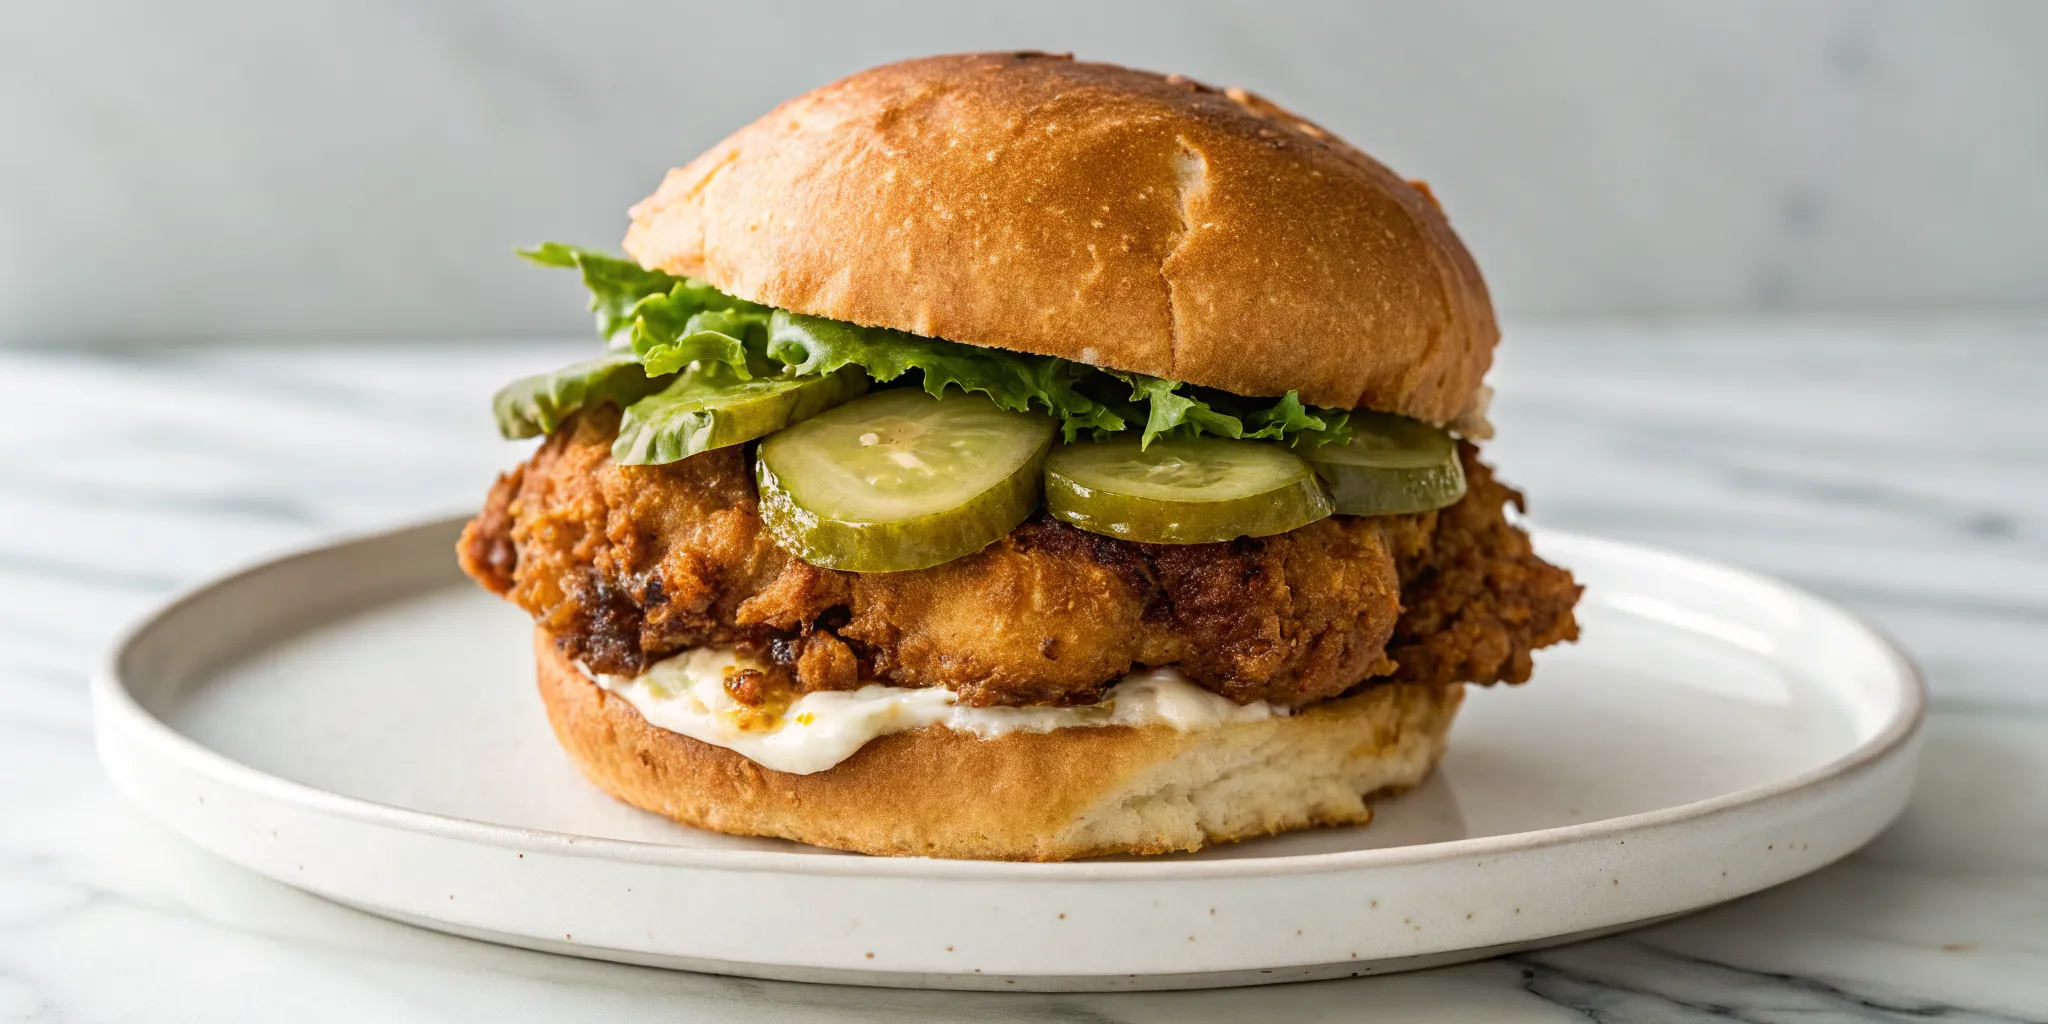
Finally, let's assemble this masterpiece. The choice of buns and toppings can take your sandwich to the next level. Opt for warm, buttery brioche buns that complement the fried chicken perfectly. For toppings, consider adding shredded lettuce and tangy dill pickle chips for a refreshing crunch that cuts through the richness. You can also include sliced tomatoes for added flavor and texture. These are the finishing touches that bring your sandwich from good to great.
Marinate Your Chicken the Right Way
The secret to an unforgettable fried chicken sandwich starts long before the chicken hits the fryer. It all begins with the marinade. This crucial step is where you build the foundation of flavor and ensure every bite is incredibly tender and juicy. Taking the time to marinate your chicken properly is the single best thing you can do to create a restaurant-quality sandwich right in your own kitchen. It’s a simple process that pays off in a big way, setting the stage for that perfect crispy exterior and succulent interior.
How Long to Marinate for Tenderness
Patience is your best friend when it comes to marinating. For truly great results, you’ll want to let your chicken soak in the buttermilk for at least four hours, but letting it sit overnight is the real game-changer. The magic of buttermilk lies in its gentle acidity, which works to tenderize the chicken by breaking down tough proteins without making the meat rubbery. This slow-and-steady process ensures the chicken stays moist and succulent during frying. Rushing this step is a common mistake, so give your chicken the time it needs to become perfectly tender.
Spice Up Your Buttermilk Marinade
While buttermilk does wonders for texture, adding spices to your marinade infuses the chicken with flavor from the inside out. Think of it as your first layer of seasoning. A great starting point is a mix of salt, black pepper, garlic powder, and paprika. Don’t be shy with the salt; it not only adds flavor but also helps the chicken retain moisture. For a little Southern kick, add a dash of cayenne pepper or your favorite hot sauce directly into the marinade. This is your chance to customize the flavor profile to your liking.
Let it Rest: Temperature and Timing
After your chicken has finished marinating, there’s one more important pause before you start breading. Take the chicken out of the refrigerator and let it sit on the counter for about 30 minutes. Allowing the chicken to come closer to room temperature is a pro tip that ensures it cooks evenly. Tossing ice-cold chicken into hot oil can cause the oil’s temperature to drop dramatically, resulting in a greasy crust and unevenly cooked meat. This simple rest prevents a soggy finish and helps you achieve that perfectly golden, crispy coating we’re all after.
Get the Perfect Crispy Coating
After your chicken has soaked up all that delicious buttermilk goodness, it’s time to build the perfect crunchy exterior. This is where the magic really happens. A great coating provides that satisfying crunch and a burst of flavor that perfectly complements the tender, juicy chicken inside. It’s a non-negotiable part of a truly great fried chicken sandwich. Getting this right isn't complicated, but it does require attention to a few key details. We’ll focus on three things: creating the right flour mixture, using a simple technique for extra crunch, and making sure your breading is packed with flavor.
Mix the Perfect Flour Blend
The secret to a light and crispy crust starts with your dry ingredients. While all-purpose flour provides a solid base, adding cornstarch is the key to achieving that perfect, shatter-like crunch. Cornstarch helps prevent too much gluten from forming, which results in a lighter, crispier coating that doesn't get greasy. A great starting point is a ratio of about three parts flour to one part cornstarch. This simple blend creates a crust that stays wonderfully crisp, even after you add your favorite sauces. This guide to crispy coatings can show you how different starches affect the final texture.
Use the Double-Dredge for Extra Crunch
If you love those thick, craggy bits of crust that catch sauce and add so much texture, the double-dredge technique is your best friend. It sounds fancy, but it’s incredibly simple and makes a huge difference. First, take a piece of chicken from the marinade and press it firmly into your seasoned flour blend. Make sure it’s completely covered. Then, dip it right back into the buttermilk marinade for just a moment before dredging it in the flour a second time. This process builds up an extra-thick layer, creating an incredibly crunchy crust that’s full of nooks and crannies.
Season Your Breading Generously
A bland coating is a missed opportunity for flavor. Your flour mixture should be so well-seasoned that it tastes good all on its own. Don’t be shy here! To your flour and cornstarch mix, add a generous amount of salt, black pepper, garlic powder, onion powder, and paprika for color and smokiness. For that classic Southern kick we love, a pinch of cayenne pepper is a must. A well-seasoned breading ensures every single bite of your sandwich is bursting with flavor. You can even create your own signature taste by experimenting with your favorite spice blends.
Fry Your Chicken to Crispy Perfection
This is where the magic happens. Your chicken has been marinated and breaded, and now it’s ready for its hot oil bath. Frying can feel intimidating, but with a few key techniques, you can get a perfectly golden, shatteringly crisp crust every single time. It’s all about controlling the heat, knowing when it’s done, and letting it rest properly. Don’t worry, I’ll walk you through each step. Let’s get that perfect crunch.
Choose the Right Oil and Temperature
The secret to a crispy, non-greasy crust starts with your frying setup. You’ll want to use a neutral oil with a high smoke point, like canola, vegetable, or peanut oil. These oils can handle the heat without burning and won’t interfere with the flavor of your chicken. The most important part is maintaining the right temperature. Your oil should be between 350°F and 375°F. Too low, and the chicken will absorb oil and become soggy; too high, and the breading will burn before the inside is cooked. A deep-fry or candy thermometer is your best friend here for achieving that perfect crispy exterior.
Know When Your Chicken is Done
Once your oil is at the right temperature, carefully place a few pieces of chicken in the pot, making sure not to overcrowd it. Fry for about 6 to 8 minutes on each side, until the chicken is a deep golden brown and looks incredibly crispy. While visual cues are helpful, the only way to be certain your chicken is cooked through is by using a meat thermometer. For perfectly cooked chicken, the internal temperature should reach at least 165°F. If you're using dark meat like thighs, you can even take it up to 170°F for an even juicier result.
Drain on a Wire Rack (Not Paper Towels!)
You’ve fried your chicken to perfection, so don’t let it get soggy now. It’s tempting to place the hot chicken directly onto a plate lined with paper towels, but this is a classic mistake. Paper towels trap steam, which will immediately start to soften that beautiful crust you just created. Instead, transfer the fried chicken to a wire cooling rack set over a baking sheet. This allows air to circulate all around the chicken, keeping the bottom just as crispy as the top while the excess oil drips away. This simple step is key to maintaining that delightful crunch all the way to the table.
Assemble the Ultimate Chicken Sandwich
You’ve done the hard work. The chicken is marinated, perfectly breaded, and fried to a gorgeous golden brown. Now comes the fun part: building a sandwich that does justice to that incredible chicken. The final assembly is just as important as the prep, turning a great piece of fried chicken into an unforgettable meal. Every layer, from the bun to the sauce, plays a role in creating that perfect bite. Of course, if you'd rather leave the assembly to the pros, you can always order a sandwich made with love right here in our kitchen.
Pick a Bun That Holds Up
The foundation of any great sandwich is the bun, and a fried chicken sandwich is no exception. You need something soft enough to bite into easily but sturdy enough to hold everything together without getting soggy. A warm, buttery brioche bun is the perfect choice. Its slight sweetness complements the savory chicken, and its structure can handle juicy toppings and a generous spread of sauce. Toasting the bun with a little butter before you start building adds another layer of flavor and texture that makes a world of difference.
Layer Your Ingredients for the Best Bite
How you stack your sandwich matters more than you might think. For the ultimate flavor experience, there’s a method to the madness. Start with your bottom bun and add a thin layer of sauce, then your pickles. This creates a barrier that helps prevent the bun from getting soggy. Next, place your crispy chicken, followed by another drizzle of sauce. Top it off with crisp shredded lettuce and the top bun. This specific layering technique ensures you get a balanced mix of creamy, crunchy, tangy, and savory in every single bite.
Add Toppings and a Signature Sauce
This is where you can really make the sandwich your own. While the chicken is the star, the toppings and sauce are the supporting cast that brings everything together. Crisp dill pickles are non-negotiable; their tangy crunch cuts through the richness of the fried chicken. Beyond that, a signature sauce is what will make your sandwich truly memorable. You can whip up a simple but delicious dill and yogurt sauce or a classic spicy mayo. Don’t be shy with it, a good sauce adds moisture and a big punch of flavor that ties all the ingredients together.
Make It Your Own: Customizing Your Sandwich
Once you’ve mastered the basics of a buttermilk fried chicken sandwich, the real fun begins. The best sandwich is the one that’s made just for you, so don’t be afraid to play with flavors and techniques. Whether you like it spicy, loaded with toppings, or a little on the lighter side, there are plenty of ways to put your own spin on this classic. Think of this recipe as your starting point for creating a sandwich that’s perfectly tailored to your taste. Of course, if you’d rather leave the cooking to us, you can always order now and let us handle the details.
Turn Up the Heat with a Spicy Marinade
If you like a little kick, infusing the chicken with spice from the very beginning is the way to go. Adding hot sauce or a generous pinch of cayenne pepper to your buttermilk marinade does more than just add heat. A spicy buttermilk mixture works its way deep into the meat, ensuring every bite is packed with flavor. This step also helps make the chicken incredibly tender and juicy, especially if you let it marinate overnight. The acid in the buttermilk and hot sauce breaks down the proteins, giving you a perfectly succulent foundation for your fiery sandwich.
Get Creative with Toppings
The right toppings can take your sandwich from good to great. A warm, buttery brioche bun is a fantastic choice, and you can’t go wrong with classic additions like crisp shredded lettuce and tangy dill pickle chips. But why stop there? Fresh tomato slices can add a juicy, bright flavor that cuts through the richness of the fried chicken. You could also whip up a zesty sauce or a creamy dill dressing to add another layer of flavor. Don't be afraid to experiment with toppings like coleslaw for extra crunch or even a slice of sharp cheddar cheese.
Try an Air Fryer or Oven-Baked Version
Craving that crispy chicken flavor without the deep-frying? You have options. For a healthier alternative, the air fryer is your best friend. After dredging the chicken, just place it in the basket, give it a light spray with cooking oil, and air fry it at 370°F for about 20 minutes, flipping it halfway through. You can also bake the chicken in the oven. Arrange it on a greased baking sheet and bake at 425°F for around 25 minutes. Spraying the tops with cooking spray will help you get that delicious, crispy finish you’re looking for.
Make it Gluten-Free
A gluten sensitivity doesn't mean you have to miss out on a fantastic fried chicken sandwich. With a couple of simple swaps, you can easily adapt this recipe. If you need a gluten-free buttermilk option, you can make your own by adding one tablespoon of lemon juice or apple cider vinegar to a cup of unflavored non-dairy milk, like almond or soy. Let it sit for a few minutes until it curdles slightly. For the breading, simply substitute the all-purpose flour with your favorite gluten-free all-purpose flour blend.
Pro Tips for Restaurant-Quality Chicken
Making a truly great fried chicken sandwich at home can feel like a big project, but a few simple tricks can make all the difference. These are the tips we use in professional kitchens to get consistent, delicious results every single time. From avoiding common pitfalls to prepping like a pro, these small adjustments will help you create a sandwich that rivals your favorite restaurant's. Of course, if you want to skip the cleanup and get right to the good part, you can always order now and let us handle the cooking.
Avoid These Common Frying Mistakes
The secret to a perfectly crispy, non-greasy crust is maintaining the right oil temperature. You want your oil to stay at a steady 350°F. If it’s too low, the chicken will absorb too much oil and become soggy. If it’s too high, the outside will burn before the inside is cooked. A deep-fry thermometer is your best friend here. Also, be careful not to overcrowd your pot. Frying just a few pieces at a time helps the oil temperature stay consistent, ensuring every piece comes out golden and delicious.
Guessing when your chicken is done is a recipe for disaster. The only way to be certain your chicken is cooked safely and is still perfectly juicy is to use a digital meat thermometer. Chicken is safe to eat when it reaches an internal temperature of 165°F. Checking the temperature prevents you from overcooking the chicken, which leads to dry, tough meat. Just insert the thermometer into the thickest part of the chicken, avoiding the bone, for an accurate reading.
Prep Ahead to Save Time
Good things come to those who wait, and that’s especially true for fried chicken. Marinating your chicken in buttermilk is the key to making it incredibly tender and flavorful. For the best results, let it marinate overnight in the refrigerator. The buttermilk’s gentle acidity works to break down the proteins in the chicken, resulting in a super juicy bite. This simple prep step makes a world of difference and is a non-negotiable for any great buttermilk fried chicken sandwich recipe.
If you’re short on time, even an hour in the marinade will do some good. But planning ahead really pays off. By getting your chicken into the buttermilk the night before, you split the work into two manageable steps. The next day, all you have to do is bread and fry. This makes cooking feel less chaotic and more enjoyable, which is what Southern cooking is all about.
Store and Reheat Leftovers Like a Pro
If you happen to have any leftovers, storing them correctly is key to enjoying them later. Let the chicken cool completely, then place it in an airtight container. It will keep in the fridge for up to three days. This method helps preserve the texture and flavor without the chicken absorbing other odors from your refrigerator. You can also freeze fried chicken for up to two months, which is a great option if you make a big batch.
Whatever you do, step away from the microwave. It will turn that beautiful crispy coating into a soggy mess. The best way to reheat fried chicken is in the oven or an air fryer. Place the chicken on a wire rack set on a baking sheet and heat it at around 375°F until it’s warmed through and the skin is crispy again. This method brings the chicken back to its original glory, so your second-day sandwich is just as good as the first.
Related Articles
- How to Make the Perfect Fried Chicken Sandwich — Notch8 Carolina Kitchen
- How to Make the Perfect Southern Fried Chicken Plate — Notch8 Carolina Kitchen
Frequently Asked Questions
What can I use if I don't have buttermilk? No buttermilk? No problem. You can easily make a substitute at home with regular milk and an acidic ingredient. Just add one tablespoon of either lemon juice or white vinegar to one cup of milk. Let it sit for about five to ten minutes until it starts to look slightly curdled. This homemade version mimics the acidity of real buttermilk, so it will still tenderize your chicken beautifully.
Is it possible to marinate the chicken for too long? Yes, you can definitely overdo it. While an overnight soak is the sweet spot for tender, flavorful chicken, I wouldn't recommend going much longer than 24 hours. The acid in the buttermilk will continue to break down the proteins in the chicken, and if left for too long, the meat can start to develop a slightly mushy or stringy texture.
Why does my breading fall off when I fry the chicken? This is a common frustration, but it's usually an easy fix. Often, the breading slides off because the coating didn't have a chance to properly adhere to the chicken. After you've double-dredged your chicken, let it rest on a wire rack for about 15 to 20 minutes before frying. This short rest helps the flour coating hydrate and cling to the chicken, creating a more durable crust that stays put in the hot oil.
How can I keep my chicken crispy while I fry the rest of the batch? The key is to avoid trapping steam. Instead of placing cooked chicken on paper towels, set it on a wire rack over a baking sheet. To keep everything hot and crisp, you can place the entire baking sheet in a preheated oven set to a low temperature, around 200°F. This setup allows air to circulate, preventing the bottoms from getting soggy while you finish frying the remaining pieces.
Can I really get a crispy crust using an air fryer? You absolutely can. While it won't be exactly the same as deep-frying, an air fryer does a fantastic job of creating a crunchy exterior. After breading the chicken, give both sides a light but thorough spray with cooking oil. Place it in the air fryer basket and cook at 370°F for about 20 to 25 minutes, flipping the chicken halfway through. The result is a wonderfully crispy piece of chicken with much less oil.