
How to Make Old Fashioned Banana Pudding From Scratch
The idea of making custard from scratch can feel a little intimidating. We’ve all heard the horror stories of lumpy pudding, runny results, or the dreaded scrambled eggs. But creating a perfect old fashioned homemade banana pudding is much easier than you think, as long as you have the right techniques. This guide is designed to take the guesswork out of the process. We’ll break down every step into simple, actionable advice, from how to properly temper your eggs to the secret to keeping your wafers from getting soggy. Consider this your foolproof roadmap to a flawless, crowd-pleasing dessert that will make you feel like a true Southern cook.
Key Takeaways
- A Homemade Custard is Non-Negotiable: The secret to authentic, old-fashioned banana pudding is a from-scratch vanilla custard. Using simple pantry staples and cooking it yourself creates the rich flavor and silky texture that a box mix can never match.
- Technique Prevents Common Pitfalls: To get a perfectly smooth custard, cook it over low heat while stirring constantly. Always temper your eggs by whisking in a small amount of the hot liquid before adding them to the pot—this simple step is the key to avoiding lumps.
- Layer Smart for the Best Texture: Let your custard cool to room temperature before you start layering. This prevents the wafers from becoming instantly soggy and keeps the bananas fresh. For the best results, assemble the pudding a few hours before serving.
Why Is Old-Fashioned Banana Pudding So Beloved?
There are few desserts that capture the heart of the South quite like banana pudding. It’s more than just a sweet treat; it’s a bowl full of memories and a taste of home. But what makes this simple dessert so special? It comes down to its comforting roots and the undeniable quality of a homemade recipe.
A True Southern Comfort Classic
For so many of us, banana pudding is the ultimate Southern comfort food. It’s a staple at family reunions, church potlucks, and Sunday dinners for a reason. The magic is in its simplicity and the perfect harmony of its layers. You have the sweet, fresh banana slices tucked between rows of vanilla wafers, all enveloped in a cool, creamy vanilla custard. This classic dessert is a true Southern United States tradition, passed down through generations. It’s the kind of recipe that feels like a warm hug, instantly connecting us to cherished family moments and the simple joy of sharing good food with people you love.
Why Homemade Always Wins
While you can find banana pudding in stores, nothing compares to a version made from scratch. The difference is night and day. A homemade pudding uses simple, real ingredients for a rich, authentic flavor that you just can’t get from a box mix. When you make it yourself, you control the texture—the vanilla custard is silkier, the wafers soften just enough without turning to mush, and the bananas are perfectly fresh. It’s a family tradition for many because that extra effort is a true act of love. It’s about creating something genuinely comforting and delicious, a dessert that tastes like it was made with care because it was.
What You'll Need for Authentic Banana Pudding
Before we get into the mixing and layering, let's talk about what makes a banana pudding truly special. The secret to that classic, comforting flavor isn't just in the steps—it's in the ingredients. If you want a dessert that tastes like it came straight from grandma's kitchen, you have to forget the instant pudding mix and other shortcuts. We're going back to basics to create something genuinely memorable.
Gathering the right components is the first and most important part of the process. From the rich, homemade custard to the perfectly ripe bananas and classic wafers, each element plays a starring role. Think of it as building a foundation; if the foundation is solid, the rest comes together beautifully. Getting these details right will set you up for a perfect pudding every single time, one with a silky texture and deep, authentic flavor that a box mix just can't replicate. Let's break down exactly what you'll need to have on hand for the three key parts: the custard, the layers, and that beautiful meringue topping.
For the Creamy Custard Base
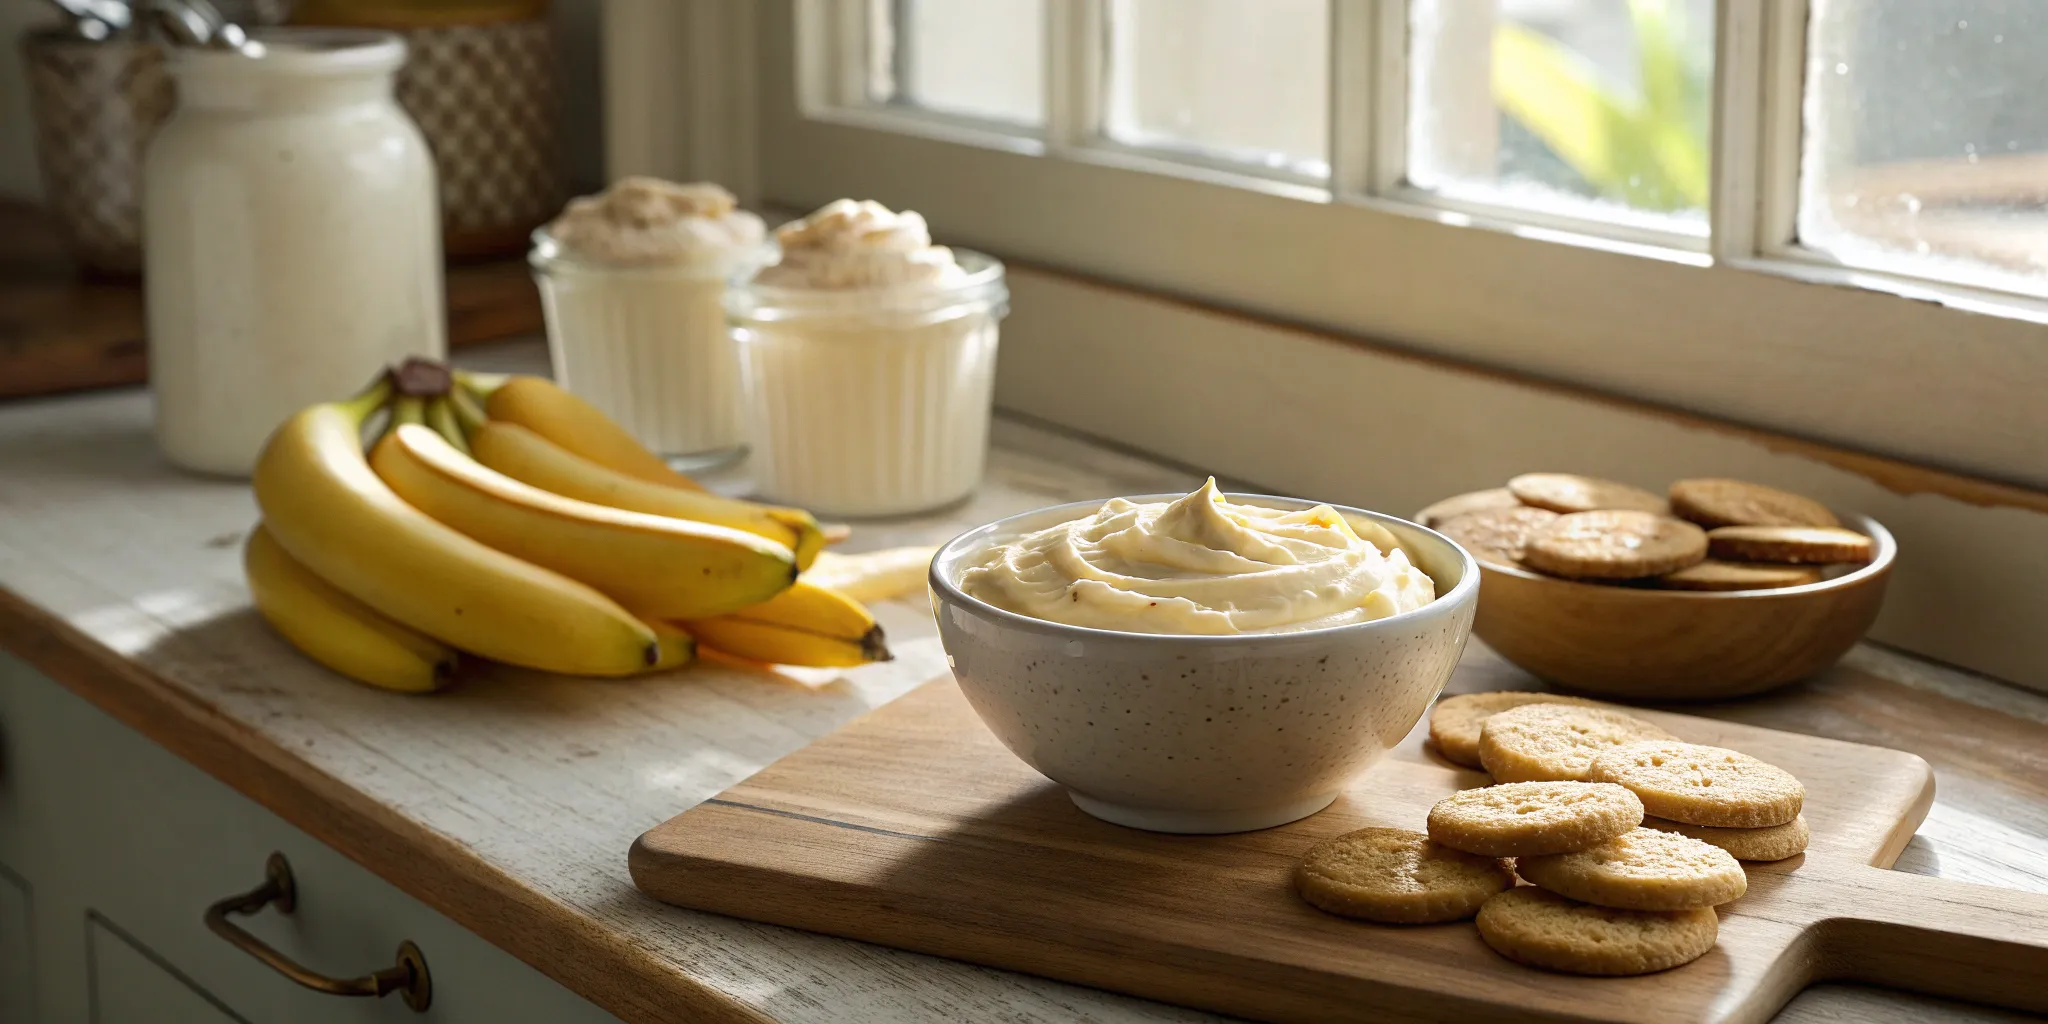
The heart of any great banana pudding is a rich, homemade vanilla custard. This is what separates a good pudding from an unforgettable one. To make it, you’ll need simple pantry staples: all-purpose flour, sugar, salt, egg yolks, and whole milk. This is an old-fashioned banana pudding recipe made completely from scratch, and that homemade vanilla pudding is what gives it a silky, luxurious texture. The process involves cooking these ingredients together in a heavy pot until they thicken into a beautiful, creamy custard. It takes a little patience and stirring, but the delicious result is more than worth the effort.
How to Pick the Best Bananas and Wafers
Choosing the right bananas and wafers is a bigger deal than you might think. For the bananas, you want them to be perfectly ripe—yellow with a few brown specks, but not mushy. As the experts say, look for bananas with "no green, but not brown either." This ensures they are sweet enough to flavor the pudding but still firm enough to hold their shape without turning everything into a soggy mess. When it comes to the wafers, the classic choice for an authentic taste is Nabisco Nilla Wafers. Their light, crispy texture and delicate vanilla flavor are the perfect complement to the creamy custard and sweet bananas.
For the Perfect Meringue Topping
That beautiful, fluffy meringue on top isn't just for looks—it's a traditional finish that adds a light, airy texture and a touch of sweetness to balance the rich custard. To make it, you'll use the egg whites left over from making your custard, so nothing goes to waste. You’ll beat the egg whites until they get foamy, then gradually add sugar and continue beating until you have stiff, glossy peaks. This meringue topping is then spread over the pudding and baked until it's a beautiful light golden brown, creating a stunning and delicious final layer.
How to Make Banana Pudding From Scratch: The Traditional Method
Alright, let's get to the good part—making this classic dessert from scratch. Don't be intimidated by the steps; making traditional banana pudding is all about patience and layering flavors. The magic happens when you combine a rich, homemade custard with sweet bananas and crisp vanilla wafers, all topped with a fluffy, toasted meringue. It’s the kind of dessert that tastes like a hug from your grandma. This isn't the instant-pudding-mix version; we're talking about the real deal, the kind that fills the whole kitchen with an incredible aroma.
We'll walk through each part of the process, from cooking the perfect custard to getting that beautiful golden-brown top on your meringue. The key is taking your time with each component. The custard needs to be smooth and creamy, the bananas perfectly ripe, and the meringue light and airy. When these elements come together, they create a dessert that's so much more than the sum of its parts. It's a true Southern staple for a reason. So, grab your apron, and let's create a dessert that will have everyone asking for seconds. And if you're ever short on time, you can always visit us for a taste of our own Southern comfort classics.
Step 1: Create the Perfect Vanilla Custard
The heart and soul of any true banana pudding is the vanilla custard. To get started, grab a heavy-bottomed pot and whisk together your flour, sugar, and a pinch of salt. In a separate bowl, beat your egg yolks and stir in the milk. Now, slowly pour the egg and milk mixture into your dry ingredients, whisking constantly to keep it smooth. Cook this over medium heat, and don't walk away! You'll need to stir continuously until the custard thickens up into a rich, creamy consistency. This homemade base is what separates a good banana pudding from a great one, giving it that authentic, old-fashioned flavor.
Step 2: Layer for the Best Flavor
With your custard ready, it's time to assemble your masterpiece. The secret to a perfect pudding is all in the layers. Start by placing a single layer of vanilla wafers across the bottom of a trifle dish or a 9x13 glass pan. Top the wafers with a layer of sliced bananas. Then, pour a generous amount of your warm vanilla custard over the top, making sure to cover everything. Repeat these layers—wafers, bananas, custard—until you run out of ingredients or reach the top of your dish. This layering method ensures that every single bite is packed with the perfect balance of creamy, sweet, and crunchy.
Step 3: Prepare and Bake the Meringue
The meringue is the crowning glory of your banana pudding. To make it, start by beating your egg whites in a clean bowl until they become foamy. Then, begin adding your sugar, just one tablespoon at a time, while continuing to beat the whites. Keep going until the meringue is glossy and forms stiff peaks—that's when you can turn the beater upside down and the peak holds its shape. Gently spread the meringue over your assembled pudding, making sure it touches the edges of the dish to create a seal. Bake it in a preheated oven until the top is a beautiful light golden brown. This adds a wonderful texture and a touch of sweetness that completes the dessert.
Pro Tips for Perfect Pudding Every Time
Making banana pudding from scratch is a true labor of love, but a few simple tricks can make all the difference between a good dessert and a great one. These are the non-negotiable steps I follow to get that perfect, creamy, old-fashioned pudding every single time. With a little patience and technique, you’ll be serving up a dessert that tastes just like grandma used to make—or maybe even better.
Cook Low and Slow (and Keep Stirring)
The secret to a velvety smooth custard is patience. Keep your stovetop on a low, gentle heat and stir constantly. This might feel tedious, but it's the only way to prevent the bottom from burning and ensure every spoonful is perfectly creamy. Rushing this step is a one-way ticket to lumpy, scorched pudding, and nobody wants that. A good old-fashioned recipe always emphasizes this slow and steady approach because it truly is the foundation of a flawless custard base. You're looking for the mixture to thicken enough to coat the back of a spoon.
How to Temper Eggs Without Scrambling Them
Have you ever ended up with little bits of cooked egg in your pudding? It’s a common mistake, but there’s an easy fix: tempering your eggs. Before you add the egg yolks to the hot custard mixture on the stove, whisk a small amount of the warm liquid into the yolks first. This gently raises their temperature. Once they’re warmed up, you can safely pour the egg mixture back into the pot without fear of scrambling. This simple step is the key to a silky, lump-free pudding and is a technique used by chefs to create smooth sauces and custards.
Avoid Soggy Wafers and Runny Pudding
Nothing ruins the look of a beautiful banana pudding faster than brown, mushy bananas on top. To keep them fresh and bright, wait to add the final layer of sliced bananas until just before you serve it. The same goes for any crushed wafer topping—adding it at the last minute preserves that delightful crunch. While a little lemon juice can help slow the browning process, bananas will eventually turn after a day or so in the fridge. For the best texture and appearance, timing is everything. This ensures your dessert looks as incredible as it tastes when it hits the table.
Common Mistakes That Can Ruin Your Pudding
Making banana pudding is a true labor of love, but a few simple missteps can turn your masterpiece into a mushy mess. Don't worry, we've all been there! The good news is that these common mistakes are easy to avoid once you know what to look for. Getting the texture and flavor just right is all about timing and temperature. Let's walk through the most frequent slip-ups so you can serve a perfect, crowd-pleasing pudding every single time.
Letting Your Bananas Turn Brown
Nothing is less appealing than seeing sad, brown banana slices in what should be a beautiful dessert. This happens because of oxidation, the same process that turns a cut apple brown. To avoid this, timing is everything. The best strategy is to add the top layer of bananas and any crushed wafer garnish right before you serve the pudding. This keeps them looking fresh and vibrant. If you absolutely must assemble it a bit ahead of time, you can try gently tossing the slices in a tiny bit of lemon juice to slow the browning process, but adding them last is always the best bet for a picture-perfect banana pudding.
Getting the Temperature and Timing Wrong
Have you ever made a pudding that turned out thin and runny? It’s a common and frustrating problem. The most frequent reason a pudding doesn't set is simply that it wasn't cooked long enough to thicken properly. Your custard should be noticeably thick before you even think about layering it. A great test is to see if it coats the back of a spoon. This step requires patience and constant stirring over low heat, but it’s the secret to a rich, velvety texture. Rushing the process or turning up the heat can lead to a soupy consistency or, even worse, scorched milk and scrambled eggs.
Layering While the Pudding Is Still Hot
After you’ve perfected your custard, it’s tempting to assemble your pudding right away. But layering while the pudding is still piping hot is a critical mistake. Hot custard will instantly turn your crisp vanilla wafers into mush and start to cook the bananas, making them soft and discolored. One of the most important tips is to let the cooked pudding cool down before you layer it with the bananas. This simple pause stops the heat from overcooking the other ingredients. Let the custard sit until it’s just warm to the touch. This preserves the distinct textures that make banana pudding so special, creating a dessert that’s as delicious as the Southern classics on our menu.
How to Layer for Perfect Results
The secret to a truly spectacular banana pudding isn't just in the ingredients—it's in the assembly. How you layer your pudding determines the final texture and ensures that every spoonful is a perfect blend of creamy custard, sweet bananas, and soft-yet-structured wafers. It’s a simple process, but doing it with a little intention makes all the difference. Think of it as building your dessert from the ground up, where each layer supports the next to create that classic, comforting bite we all crave. When you’re ready for a taste of the real deal, you can always find a classic version on our menu.
Build a Strong Wafer and Banana Base
Every great banana pudding starts with a solid foundation. The classic method involves creating repeating layers of vanilla wafers, fresh banana slices, and vanilla pudding. Begin by arranging a single layer of vanilla wafers to cover the bottom of your dish. This creates a sturdy base that will soak up some of the custard without turning completely to mush. Next, add a layer of sliced bananas over the wafers. Finally, pour a generous layer of your homemade custard on top. You’ll repeat this pattern until your dish is full, creating a beautiful, striped effect and ensuring a balanced distribution of every component.
Distribute the Custard for Even Flavor
To get that perfectly creamy consistency in every bite, you need to spread the custard evenly over each layer. As you add the pudding, make sure it covers the bananas completely. This is a crucial step because it helps prevent the bananas from browning and keeps them fresh. An even distribution of custard also guarantees that the wafers soften just the right amount, creating that signature texture that’s neither crunchy nor soggy. Take your time with this step; a little patience here goes a long way in creating a visually appealing and delicious final product.
Seal the Edges with Meringue
The crowning glory of any old-fashioned banana pudding is its fluffy, toasted meringue topping. Once your layers are complete, it’s time to add this final touch. Spread your freshly whipped meringue evenly over the top of the pudding, making sure it reaches all the way to the edges of the dish. This creates a seal that locks in all the flavor and moisture. You can create pretty peaks with the back of a spoon for a more traditional look. Bake it in a low-heat oven until the meringue turns a beautiful light golden brown, giving you a stunning finish that perfectly complements the creamy layers underneath.
Fun Variations on the Classic Recipe
While nothing beats the classic, old-fashioned recipe we all know and love, sometimes it's fun to play around in the kitchen. If you're feeling adventurous or just want to try something new, these simple variations can put a fresh spin on your favorite dessert. From adding decadent new flavors to changing up the presentation, here are a few ideas to get you started.
Try a Chocolate or Peanut Butter Twist
Banana, chocolate, and peanut butter are a dream team, so why not invite them to the party? Adding a layer of richness is easy. For a peanut butter twist, you can whip some creamy peanut butter into your custard or even layer it with peanut butter cookies instead of vanilla wafers. If you're a chocoholic, try folding mini chocolate chips into the pudding or drizzling a thin layer of chocolate ganache between the bananas and custard. These delicious variations can transform the dessert into something truly decadent, perfect for when you want to impress your guests or just treat yourself.
Vegan and Other Dietary Swaps
Everyone should be able to enjoy a bowl of creamy banana pudding. With a few simple swaps, you can easily adapt the classic recipe for different dietary needs. To make it vegan, use your favorite plant-based milk like oat or almond milk and thicken the custard with cornstarch instead of eggs. You can find plenty of vegan vanilla wafers at the store, too. For a gluten-free version, just swap in your favorite gluten-free shortbread or vanilla cookies. You can find great discussions online about making a custard base that can be modified for almost any diet, so no one has to miss out.
Serve It Up in a Trifle or Individual Jars
How you serve your banana pudding can completely change the experience. Instead of a standard baking dish, try layering it in a glass trifle bowl. This lets you show off those beautiful, distinct layers of wafers, bananas, and creamy custard. For parties or smaller gatherings, individual servings are a fantastic option. Layer the pudding in small mason jars, glasses, or ramekins. Not only does it look elegant, but it also makes serving a breeze—no scooping required! This modern serving style is perfect for making a classic dessert feel fresh and special for any occasion.
The Surprising History of Banana Pudding
Every spoonful of banana pudding feels like a taste of tradition. It’s a staple at family reunions, church potlucks, and Sunday dinners across the South. But have you ever wondered where this iconic dessert actually came from? The story is a little different than you might expect, tracing a path from the pages of a Massachusetts magazine to its rightful place as a Southern comfort food legend. It’s a tale of culinary evolution, where a simple ingredient swap and some clever marketing transformed a fancy dessert into the humble, beloved classic we all know today. Let's look at how banana pudding earned its spot in the Southern dessert hall of fame.
Where Did This Southern Classic Come From?
While banana pudding is the quintessential Southern dessert, its story didn't start below the Mason-Dixon line. The first known recipe actually appeared in an 1888 issue of Good Housekeeping, a magazine based in Massachusetts. This early version was quite different from what we enjoy now. So, how did it become a Southern icon? The answer lies in its simplicity and scalability. As bananas became more affordable and accessible across the country, the dessert’s popularity grew. It was the perfect dish to make in large batches for community gatherings, which is a cornerstone of Southern culture. The dessert we now consider a Southern staple quickly became the go-to for feeding a crowd with something sweet and satisfying.
From Sponge Cake to Vanilla Wafers
The original banana pudding was a bit more formal, constructed much like a classic English trifle with layers of sponge cake, custard, and sliced bananas. It was delicious, but it wasn't quite the pudding we crave today. The real game-changer arrived in the 1920s: vanilla wafers. Nabisco began printing a banana pudding recipe on its vanilla wafer boxes, and this simple marketing move was brilliant. The crisp, sweet cookies were an ideal substitute for the sponge cake, offering a perfect texture that softened just right in the creamy custard. This new, easier version took off, and soon, the vanilla wafer became the standard, cementing the recipe as the old-fashioned classic we cherish.
How to Serve and Store Your Banana Pudding
You’ve created a masterpiece, and now it’s time for the big reveal. Serving and storing your banana pudding correctly ensures every spoonful is as perfect as the first. A little planning goes a long way in keeping the texture creamy and the flavors bright, whether you’re serving it right away or saving some for later. After all, a dessert this special deserves to be enjoyed at its absolute best. And if you find yourself short on time, you can always check out our dessert menu for a little inspiration or a quick fix.
Presentation Ideas for Any Occasion
How you serve your banana pudding can make it feel even more special. For a family-style gathering or a potluck, nothing beats a classic presentation. Layering it in a big glass trifle dish shows off the beautiful stripes of custard, wafers, and bananas. A simple 13"x9" glass pan also works wonderfully and makes it easy to scoop and serve. If you’re hosting a party and want a more personal touch, try serving it in individual jars or small glass bowls. It looks elegant, and your guests can just grab one and dig in. Top each serving with a dollop of whipped cream and a sprinkle of crushed wafers right before you hand them out.
How to Keep It Fresh in the Fridge
Leftover banana pudding is one of life’s great joys, but only if it’s stored properly. To keep it fresh, cover the dish tightly with plastic wrap, pressing the wrap directly onto the surface of the pudding. This helps prevent a skin from forming and keeps it from absorbing any other flavors from your fridge. Stored this way, your pudding will stay delicious for up to four days. One thing to remember: banana pudding does not freeze well. The freezing and thawing process will ruin the creamy texture of the custard and make the bananas mushy, so it’s best to make just enough to enjoy within a few days.
Tips for Making It Ahead of Time
Planning a big dinner? You can absolutely make your banana pudding ahead of time. In fact, the pudding tastes even better if you let it sit overnight. Making the custard a day in advance gives the flavors time to meld together for a richer taste. Just be sure to cover it and keep it chilled. The key is to wait to assemble the final dessert. To avoid brown bananas and soggy wafers, layer the custard with fresh banana slices and vanilla wafers just a few hours before you plan to serve it. This way, you get all the convenience of a make-ahead dessert without sacrificing any of the freshness.
Related Articles
- The Ultimate Old Fashioned Baked Macaroni and Cheese — Notch8 Carolina Kitchen
- Comfort Foods 101: Everything You Need to Know — Notch8 Carolina Kitchen
Frequently Asked Questions
Is it really worth making the custard from scratch? Yes, it makes all the difference! A homemade custard has a rich, silky texture and deep vanilla flavor that you simply can't get from an instant pudding mix. It's the heart of an authentic Southern banana pudding and is what separates a decent dessert from an unforgettable one. That extra bit of effort is what makes it taste like a true classic.
Why did my banana pudding turn out runny? A runny pudding is almost always because the custard wasn't cooked long enough on the stovetop. It's crucial to stir the custard over low heat until it's genuinely thick and coats the back of a spoon. Rushing this step or not getting it thick enough before you start layering will result in a soupy dessert once it chills.
How do I keep my bananas from turning brown? The best way to prevent brown bananas is to manage your timing. When you assemble the pudding, make sure the custard completely covers each layer of bananas, which protects them from the air. For any bananas used as a garnish on top, it's best to add them right before you serve it to keep them looking fresh and bright.
Can I use whipped cream instead of meringue? Absolutely. While meringue is the traditional topping for an old-fashioned banana pudding, a stabilized whipped cream is a delicious alternative. It offers a lighter, cooler contrast to the rich custard. Just be sure to spread it on top after the pudding has completely chilled, not before baking like you would with meringue.
How long does banana pudding last in the fridge? When stored properly, your banana pudding should stay fresh for up to four days. The key is to cover it tightly with plastic wrap, pressing the wrap directly against the surface of the pudding to prevent a skin from forming. The texture will soften over time as the wafers absorb more moisture, but it will still be delicious.