
How to Make Southern Homemade Banana Pudding
There are certain dishes that are simply non-negotiable at a Southern gathering, and banana pudding is at the top of that list. It’s a dessert that feels both humble and celebratory, a true icon of comfort food. But how did this simple layered dessert become such a cultural cornerstone? It’s more than just the sum of its parts. It represents hospitality, family, and the simple joy of sharing good food. In this guide, we’ll explore what makes this dessert so special, from its surprising history to the essential techniques that separate a good pudding from a great one. Let’s get to the heart of what makes a southern homemade banana pudding a timeless classic.
Key Takeaways
- Master the Homemade Custard: The secret to a truly great banana pudding is a silky, lump-free custard. Achieve this by constantly whisking your ingredients on the stove to ensure the eggs cook gently and the mixture thickens smoothly.
- Ingredient Choices Are Crucial: Select bananas that are firm and just ripe—not overripe—to prevent them from getting mushy. For the richest flavor and creamiest texture, always opt for sweetened condensed milk over other alternatives.
- Layer Warm and Chill Long: Assemble your pudding while the custard is still warm to help soften the vanilla wafers into a perfect cake-like layer. Then, be patient and let it chill for at least an hour to allow the flavors to meld and the pudding to set properly.
Why Is Southern Banana Pudding So Beloved?
There are some desserts that are more than just a sweet treat at the end of a meal—they’re a feeling. Southern banana pudding is one of them. It’s the star of the show at potlucks, a staple at family barbecues, and the ultimate comfort food when you need it most. This simple, layered dessert of creamy custard, sweet bananas, and soft vanilla wafers has a way of bringing people together. But what makes it so special? It’s a combination of its comforting texture, nostalgic flavor, and a history that’s as layered as the dessert itself. It’s a taste of home, whether you grew up with it or are trying it for the first time at our kitchen.
A Sweet Piece of Southern History
Banana pudding is a dessert that feels deeply rooted in Southern tradition, especially here in South Carolina. It’s a fixture at nearly every kind of gathering. But you might be surprised to learn that its story didn't start in the South. The first known recipe actually appeared in a Massachusetts magazine back in 1888. It wasn't until after World War II that banana pudding’s identity as a true Southern classic really took hold. Over time, it became a Southern icon, evolving from a simple recipe into a cherished cultural dish that represents hospitality and comfort.
Classic Pudding vs. Modern Twists
The beauty of banana pudding lies in its classic form: rich, homemade vanilla custard layered with ripe banana slices and Nilla wafers, often topped with meringue or whipped cream. It’s perfect just the way it is. But that hasn't stopped creative cooks from putting their own spin on it. You can find all sorts of new ways with banana pudding, from chocolate banana pudding bars to peanut butter variations. These modern twists show just how versatile this dessert can be, allowing you to play with flavors while still honoring the original. It’s a recipe that invites you to make it your own.
Gather Your Ingredients for the Perfect Pudding
Before you start layering, let's talk about what goes into a truly unforgettable banana pudding. Like any of the classic Southern dishes we love, it all starts with quality ingredients. Getting these details right is what separates a good pudding from a great one, turning a simple dessert into a cherished memory. From the creaminess of the custard to the ripeness of the bananas, each component plays a starring role. Let’s walk through the essentials you’ll need to create a pudding that tastes like home.
The Heart of the Pudding: Vanilla Custard
A rich, homemade vanilla custard is the soul of any true Southern banana pudding. To create that signature creamy texture, you’ll start by whisking together sugar, flour, and salt in a pot before adding milk. Making sure the flour is fully incorporated is key to helping the pudding thicken properly. The eggs are just as important—they provide that beautiful yellow color and add a wonderful richness. A final touch of butter stirred in at the end is what gives the custard its smooth, velvety feel and deepens the flavor.
Pick the Best Bananas and Wafers
When it comes to the bananas, here’s a little secret: opt for ones that are slightly green. This helps them maintain their firmness and prevents them from turning brown and mushy too quickly once they’re layered into the pudding. While traditional recipes call for vanilla wafers, feel free to make this dessert your own. Many Southern cooks have their own preferences, with some swearing by buttery Chessman cookies for an elegant twist. Experiment and see what you like best!
Sweetened Condensed Milk: Yes or No?
This question comes up often, and for the most authentic flavor, the answer is a resounding yes. To get that perfect level of sweetness and the ultra-creamy consistency that defines a classic banana pudding, you’ll want to use sweetened condensed milk, not evaporated milk. It’s a non-negotiable ingredient in many beloved recipes, including Paula Deen's famous version, because it delivers a richness that regular milk and sugar just can't replicate. It’s the shortcut to a perfectly sweet and decadent pudding every time.
How to Make Banana Pudding the Old-Fashioned Way
Making banana pudding from scratch might sound intimidating, but it’s all about getting a few key techniques right. Forget the instant pudding mix—the real magic comes from a rich, homemade custard, perfectly layered ingredients, and a fluffy topping. Once you nail these three steps, you’ll have a dessert that tastes like it came straight from grandma’s kitchen. It’s the kind of comfort food we love to serve here at Notch8, and it’s easier to make at home than you think. Let’s walk through how to get each part just right.
Master the Homemade Vanilla Custard
The heart of any great banana pudding is a silky, homemade vanilla custard. The secret to getting that perfectly smooth texture without any lumps is all in how you start. Before you even turn on the stove, combine your sugar, flour, and salt in a medium pot. Then, gradually whisk in your milk until the flour is completely dissolved and you have a smooth mixture. This method is your best defense against lumps, as it allows the flour to incorporate fully before heat is applied. Once you start cooking, the mixture will thicken into a rich, creamy custard that forms the perfect base for your pudding.
The Secret to Perfect Layers
How you assemble your banana pudding is just as important as the ingredients you use. The right layering technique creates that classic texture where the cookies soften into a cake-like consistency. Start by covering the bottom of your dish with a single layer of vanilla wafers. Next, add a layer of freshly sliced bananas over the wafers. Now for the most important part: pour a generous amount of the warm vanilla custard over the top, making sure to cover the wafers and bananas completely. The warmth of the pudding is what helps soften the cookies and meld all the flavors together beautifully.
Meringue or Whipped Cream: Choosing Your Topping
The final touch for your banana pudding is the topping, and you have two classic choices: a fluffy meringue or fresh whipped cream. A toasted meringue is the traditional Southern way to go. If you choose this route, be sure to spread it over the warm pudding and garnish it with a few whole or crushed vanilla wafers for extra flair. If you prefer a lighter finish, you can’t go wrong with homemade whipped cream. Just be careful not to over-whip it, or you’ll end up with butter! A great banana pudding recipe often comes down to personal preference on the topping, so pick the one you love most.
Your Step-by-Step Guide to Homemade Banana Pudding
This is where the magic happens! Making banana pudding from scratch isn't complicated, but it does require a little patience and love. Think of it as a relaxing kitchen project that pays off with the most delicious, creamy dessert you can imagine. We're going to walk through it together, step by step, from making a silky smooth custard to layering it all into a beautiful final dish. Don't worry about getting it perfect on your first try; the best part about homemade banana pudding is that even the "messy" ones taste incredible. It’s a dessert that’s meant to be comforting and shared, just like the food we serve when you visit us at Notch8 Carolina Kitchen.
The key is to follow the process and not rush, especially when you're cooking the custard. That's the heart of the whole dessert, and giving it the attention it deserves will make all the difference. We'll cover how to get that perfect, creamy consistency without any lumps. Once the custard is done, the rest is just fun assembly. Grab your favorite dish—a classic trifle bowl or a simple square baking dish both work beautifully—your bananas, and your vanilla wafers, and let's build this Southern classic. This guide breaks it down into three simple stages: making the custard, assembling the pudding, and letting it chill. By the end, you'll have a dessert that tastes like home.
Make the Custard
First things first, let's make that rich, creamy custard. In a medium pot, whisk together your sugar, flour, and salt. Pour in the milk and keep whisking until everything is smooth. In a separate bowl, beat your eggs, then slowly mix them into the pot. Now, turn the heat to low and get ready to stir. This is the most important part! You'll need to stir constantly for about 18-20 minutes until the mixture thickens up. A great way to test for doneness is to dip a metal spoon in; the custard should coat the back without dripping off. Once it's thick, take it off the heat and stir in the butter and vanilla extract.
Assemble Your Pudding
Now for the fun part: putting it all together. Grab a square dish or any container you love. Start by lining the bottom with a single layer of vanilla wafers. Next, slice your bananas—using bananas that are still a little green helps them hold their shape and not turn brown too quickly. Spread the banana slices over the wafers. Then, while the pudding is still warm, pour a generous layer over the top. This helps the wafers soften into that perfect cake-like texture. Repeat with another layer of wafers, more bananas, and the rest of the pudding. For a classic look, you can arrange a few extra vanilla wafers on top.
Let It Chill
I know it’s tempting to dig in right away, but this final step is crucial. Cover your banana pudding and pop it in the refrigerator to chill for at least one hour. This time allows the pudding to fully set and gives the flavors a chance to meld together beautifully. The wafers will soften, the bananas will infuse their flavor into the custard, and everything will become one cohesive, creamy dessert. Trust me, it's worth the wait! While your pudding is chilling, you can think about what you'll serve for dinner. Maybe some Southern comfort food from our takeout menu would be the perfect pairing.
Secrets to the Best-Ever Banana Pudding
Making a truly memorable banana pudding comes down to a few small details that make a huge difference. It’s not about complicated techniques or fancy equipment; it’s about understanding the simple science behind the ingredients. These are the kinds of secrets passed down through generations that turn a good dessert into a great one. At Notch8, we believe that comfort food is all about getting those details just right.
From the texture of your custard to the ripeness of your bananas, every choice matters. If you’ve ever wondered why your pudding turned out a little lumpy or your bananas got brown and mushy too quickly, you’re in the right place. We’re sharing a few key tips that will help you create a perfectly layered, creamy, and delicious banana pudding every single time. Think of these as your secret weapons for dessert domination. Getting these fundamentals right is what separates a decent banana pudding from one that people talk about for weeks. It’s about creating a dessert that feels like a warm hug—and that’s what Southern cooking is all about. We're pulling back the curtain on some of our favorite kitchen wisdom to help you master this classic Southern treat.
Stir Your Way to a Silky Custard
The key to a perfectly smooth, lump-free custard is constant motion. You have to be a dedicated whisker. The secret to making the perfect banana pudding is constantly whisking your pudding at every stage of the process. When you’re cooking the custard on the stove, whisking prevents the eggs from scrambling and keeps the mixture from sticking to the bottom of the pan. This continuous stirring ensures everything cooks evenly, resulting in that signature silky texture we all love. Don’t walk away from the stove—give your custard the attention it deserves, and you’ll be rewarded with a flawless base for your pudding.
Get the Temperature Just Right
Patience is a virtue, especially when it comes to your ingredients. If your recipe includes cream cheese, make sure it’s at room temperature before you start mixing. Cold cream cheese is the number one cause of a lumpy filling. As Southern cooking icon Paula Deen advises, you should "put it out on the counter to bring it to room temperature." This simple step allows the cream cheese to blend seamlessly with the other ingredients, creating a smooth and creamy foundation. It might seem small, but it’s a crucial step for achieving that perfect, melt-in-your-mouth consistency.
Why Banana Ripeness Matters
Choosing the right bananas is more important than you might think. While you might reach for ripe, spotty bananas for banana bread, you’ll want to do the opposite here. The recipe works best when you use greener bananas to prevent mushiness and browning. Firmer, just-ripe bananas will hold their shape better when layered into the pudding and won’t turn into a watery mess. To give them extra staying power and keep bananas from turning brown, try tossing the slices in a little bit of lemon juice before you assemble your layers. This little trick helps preserve their color and texture, ensuring every bite is perfect.
Common Banana Pudding Mistakes (and How to Fix Them)
Even the most treasured family recipes can sometimes go sideways. If your banana pudding has ever turned out a little different than you remember from grandma's house, you're not alone. It's a simple dessert, but a few small missteps can lead to a soupy or lumpy mess. The good news is that these common mistakes are incredibly easy to fix. Getting that perfectly creamy, layered pudding is all about technique. We'll walk through the three most frequent pitfalls and show you exactly how to sidestep them for a flawless banana pudding every single time. Think of this as your secret weapon for becoming the official banana pudding expert in your family.
How to Avoid Scrambled Eggs in Your Custard
Nothing is more disappointing than finding little bits of scrambled egg in what should be a silky-smooth custard. This happens when the egg yolks cook too fast and separate from the rest of the mixture. The key to preventing this is simple but crucial: you have to whisk constantly. From the moment you temper the eggs by slowly adding the hot milk until the custard is thick and coats the back of a spoon, keep that whisk moving. This steady agitation ensures the eggs cook gently and incorporate beautifully, giving you that velvety texture you're looking for.
Say No to Mushy, Overripe Bananas
While you might reach for brown-spotted bananas for banana bread, they're the wrong choice for banana pudding. Overripe bananas will turn to mush once layered, creating a soupy texture. For the best result, choose bananas that are perfectly yellow and still firm. They'll hold their shape and provide a pleasant bite. To keep the slices from browning as you assemble your dessert, here's a pro tip: toss them gently with a little bit of lemon juice. This simple step not only preserves their bright color but also adds a subtle tang that beautifully cuts through the sweetness of the pudding.
Don't Skip the Chill Time
I know it's tempting to dig right in after you've assembled that beautiful pudding, but patience is a virtue here. Skipping the chill time is a mistake that can leave you with a runny dessert. Refrigerating your banana pudding for at least one hour—or ideally, four—is essential. This allows the vanilla wafers to soften to a perfect cake-like consistency and gives the custard time to set up properly. More importantly, it lets all those delicious flavors meld together into the classic taste we all love. A well-chilled pudding will hold its shape when you scoop it, delivering the perfect bite every time.
How to Serve Your Banana Pudding
You’ve created a masterpiece of creamy custard, sweet bananas, and soft vanilla wafers. Now it’s time for the final, crucial step: serving it. The way you present your banana pudding can make it feel even more special, whether you’re sharing it at a family dinner or bringing it to a neighborhood potluck. It's one of our favorite desserts to feature on our menu, and a few simple touches are all it takes to make yours look as good as it tastes.
Simple Garnishes for a Beautiful Finish
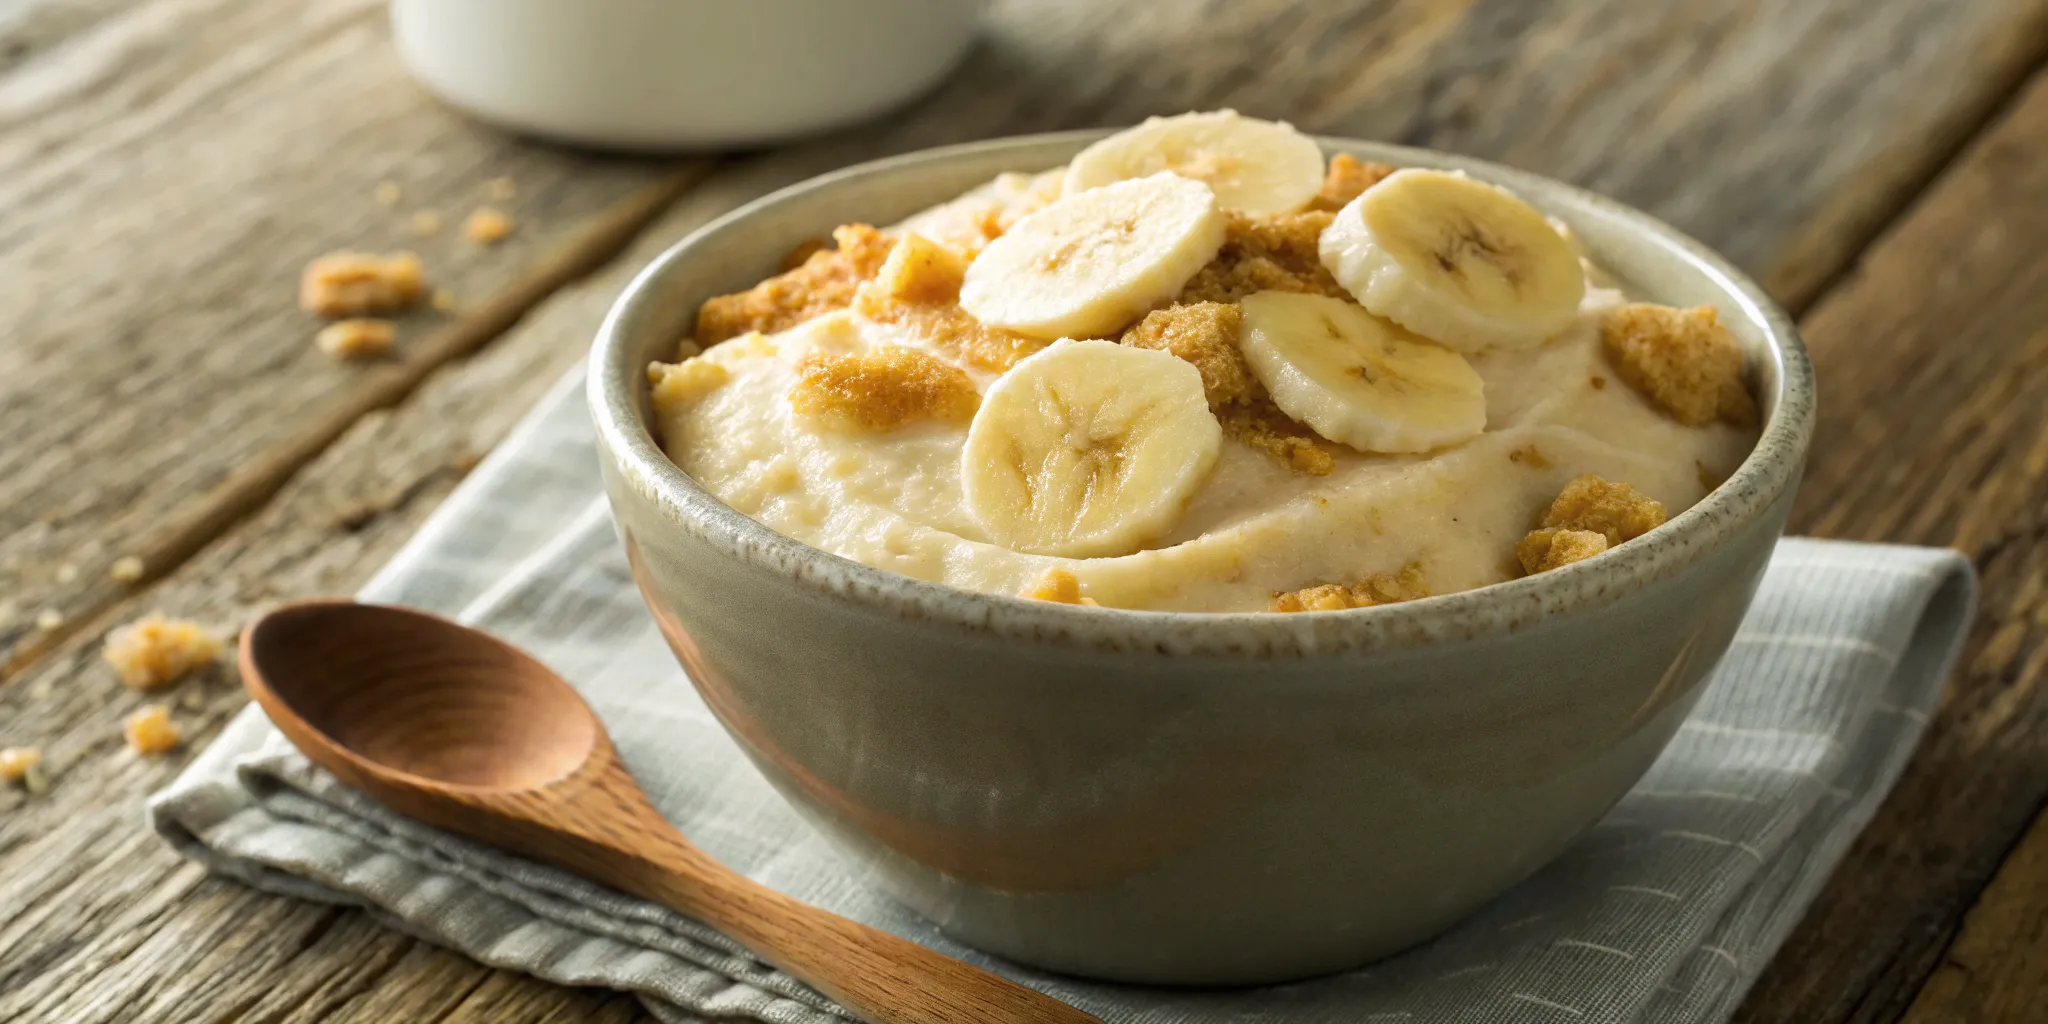
You don’t need fancy decorating skills to give your banana pudding a beautiful finish. The easiest way to add some flair is by using the ingredients you already have. Just before serving, arrange a few whole vanilla wafers around the edge of the dish or sprinkle some crushed wafers over the top for a bit of texture. Add a few slices of fresh banana to complete the look. This simple step adds a professional touch. Waiting until the last minute to add the banana slices is key, as it ensures they stay bright and fresh without browning before your guests can enjoy them.
Serve in a Big Bowl or Individual Cups
For a classic, family-style presentation, serve your banana pudding in a large glass trifle bowl or a 9x13 baking dish. This method is perfect for Sunday dinners where everyone can dig in and help themselves to a generous scoop. If you’re hosting a party or want easier portion control, consider making individual servings. Layer the pudding in small mason jars, ramekins, or clear glasses. This not only looks elegant but also makes it simple for guests to grab their own personal dessert without any fuss. It’s a great way to manage portions and make cleanup a breeze.
Tips for Making It Ahead of Time
One of the best things about banana pudding is that it’s a fantastic make-ahead dessert. In fact, it tastes even better after it has had time to chill. Letting the pudding sit in the refrigerator for at least four hours, or even overnight, allows the vanilla wafers to soften into a perfect cake-like texture and gives the flavors time to meld together beautifully. Just be sure to cover it tightly with plastic wrap to keep it fresh. When you’re ready to serve, simply pull it out of the fridge and add your fresh garnishes right before it hits the table.
How the South Does Banana Pudding
Banana pudding is more than just a dessert in the South; it’s a tradition with its own set of friendly debates and family secrets. From the way it’s prepared to the cookies you use, everyone has an opinion on what makes the perfect pudding. Here’s a look at a couple of the biggest discussions.
Baked or Chilled: Which Is for You?
Talk to anyone in the South about banana pudding, and you'll quickly find yourself in the middle of a friendly debate: should it be baked or chilled? The traditionalists often stand firmly in the baked camp. A classic Southern baked banana pudding is topped with a fluffy meringue that gets beautifully golden in the oven, adding a wonderful texture. For many, this is the only authentic way to make it. On the other hand, the no-bake, chilled version has become just as popular. It’s a creamy, cool, and refreshing dessert that’s perfect for a summer cookout. Both styles have a rich place in Southern food history, so the best one really comes down to your personal preference.
Beyond Vanilla Wafers: Other Cookie Ideas
While vanilla wafers are the undisputed classic, don't be afraid to switch things up. Changing the cookie is an easy way to put a personal spin on your pudding. For a buttery, slightly more elegant version, try using Pepperidge Farm Chessmen cookies, a key ingredient in Paula Deen’s famous recipe. Homemade shortbread or even butter cookies also work beautifully, adding a rich, crumbly texture. If you're making individual trifles or parfaits, you can use mini vanilla wafers as a garnish for a cute and crunchy finish. The cookie layer is your chance to get creative, so feel free to experiment with your favorites.
Fun Twists on the Classic Recipe
I’m a purist when it comes to Southern classics, but even I can admit it’s fun to play around in the kitchen. Once you’ve mastered the original banana pudding, you might get the itch to try something new. These variations are a great place to start. They keep the soul of the dessert we all love but add a little surprise that’s sure to get everyone talking at your next family dinner.
Try It with Peanut Butter
If you love the salty-sweet combination of peanut butter and banana, this twist is for you. Adding a layer of creamy peanut butter into your pudding creates a rich, nutty flavor that is absolutely divine. It cuts through the sweetness just enough and adds a whole new dimension. For a truly creative take, you could try making a Peanut Butter Banana Pudding Slab Pie, which is perfect for sharing. It’s a guaranteed crowd-pleaser for anyone who believes peanut butter makes everything better.
Make Chocolate Banana Pudding Bars
Chocolate and banana are a match made in heaven, so why not bring them together in your pudding? Swirling in some chocolate pudding or adding a layer of ganache creates a decadent treat that feels extra special. Turning the whole thing into bars makes it incredibly easy to serve at a potluck or party—no spoon required! There are some truly fun and delicious ways to change up the traditional recipe, and adding chocolate is one of the best. This is a fantastic way to dress up the classic dessert for a special occasion.
How to Store Leftover Banana Pudding
So you’ve made a beautiful batch of banana pudding, and somehow, you have leftovers. (First of all, congratulations on your self-control!) Storing it the right way is key to making sure that second-day scoop is just as delightful as the first.
Your refrigerator is your best friend here. Transfer any leftovers into an airtight container, or cover your dish tightly with plastic wrap. This is a crucial step to keep the pudding from drying out or absorbing any other odors from the fridge. Your pudding will stay fresh for up to four days, but for the best flavor and texture, I recommend enjoying it within 48 hours.
What to Expect with Leftovers
It’s completely normal for the pudding to change a little as it sits. You’ll notice the banana slices might start to brown after a day—that’s just oxidation at work, and it doesn’t mean the pudding is bad. If you want to slow this down next time, you can toss the banana slices in a tiny bit of lemon juice before layering them in. The vanilla wafers will also continue to soften, creating a wonderful, cake-like consistency that many people (myself included!) think is the best part.
Should You Freeze Banana Pudding?
I get this question a lot, and my honest advice is to skip the freezer. While you technically can freeze it, the texture changes quite a bit when it thaws. The creamy custard can become watery, and the bananas don’t hold up well to the process. Banana pudding is truly one of those special desserts that’s best enjoyed fresh. If you’re worried about having too much, try assembling it in smaller, individual-sized dishes next time.
Related Articles
- Comfort Foods 101: Everything You Need to Know — Notch8 Carolina Kitchen
- The Ultimate Old Fashioned Baked Macaroni and Cheese — Notch8 Carolina Kitchen
Frequently Asked Questions
Can I just use instant pudding mix instead of making the custard from scratch? You certainly can, but the real soul of a classic Southern banana pudding comes from a rich, homemade custard. Making it from scratch gives you a much creamier, more authentic flavor that you just can't get from a box. It takes a little more time, but that velvety texture is what makes the dessert truly special and worth the effort.
Why did my banana pudding turn out watery? A watery pudding is usually caused by one of two things. First, you might be using bananas that are too ripe. Overripe, mushy bananas release a lot of moisture as they sit, which can thin out the custard. Second, you might not have chilled it long enough. That chill time is essential for the custard to fully set and for the wafers to absorb some of the liquid, creating that perfect, scoopable consistency.
How do I keep the bananas from turning brown so quickly? This is a great question, and there's a simple trick for it. Start by choosing bananas that are just ripe—yellow with a hint of green at the stem—as they are firmer and brown more slowly. For extra insurance, you can gently toss the banana slices in a tiny bit of lemon juice before layering them. The acidity helps prevent browning without affecting the overall taste of the pudding.
How far in advance can I make banana pudding for a party? Banana pudding is a fantastic make-ahead dessert because it actually gets better as it sits. For the best flavor and texture, I recommend making it the day before you plan to serve it. This gives the wafers plenty of time to soften into a cake-like consistency and allows all the flavors to meld together beautifully. Just be sure to cover it tightly and keep it in the fridge.
Is it better to use meringue or whipped cream for the topping? This is the great banana pudding debate! Honestly, there's no right or wrong answer—it's all about personal preference. A baked meringue topping is the traditional Southern way, giving you a beautiful golden top with a light, marshmallow-like texture. Whipped cream offers a cooler, lighter finish that many people love, especially in warmer weather. You can't go wrong with either choice, so pick the one that sounds best to you.