
Easy Southern Style Collard Greens with Ham Hocks Recipe
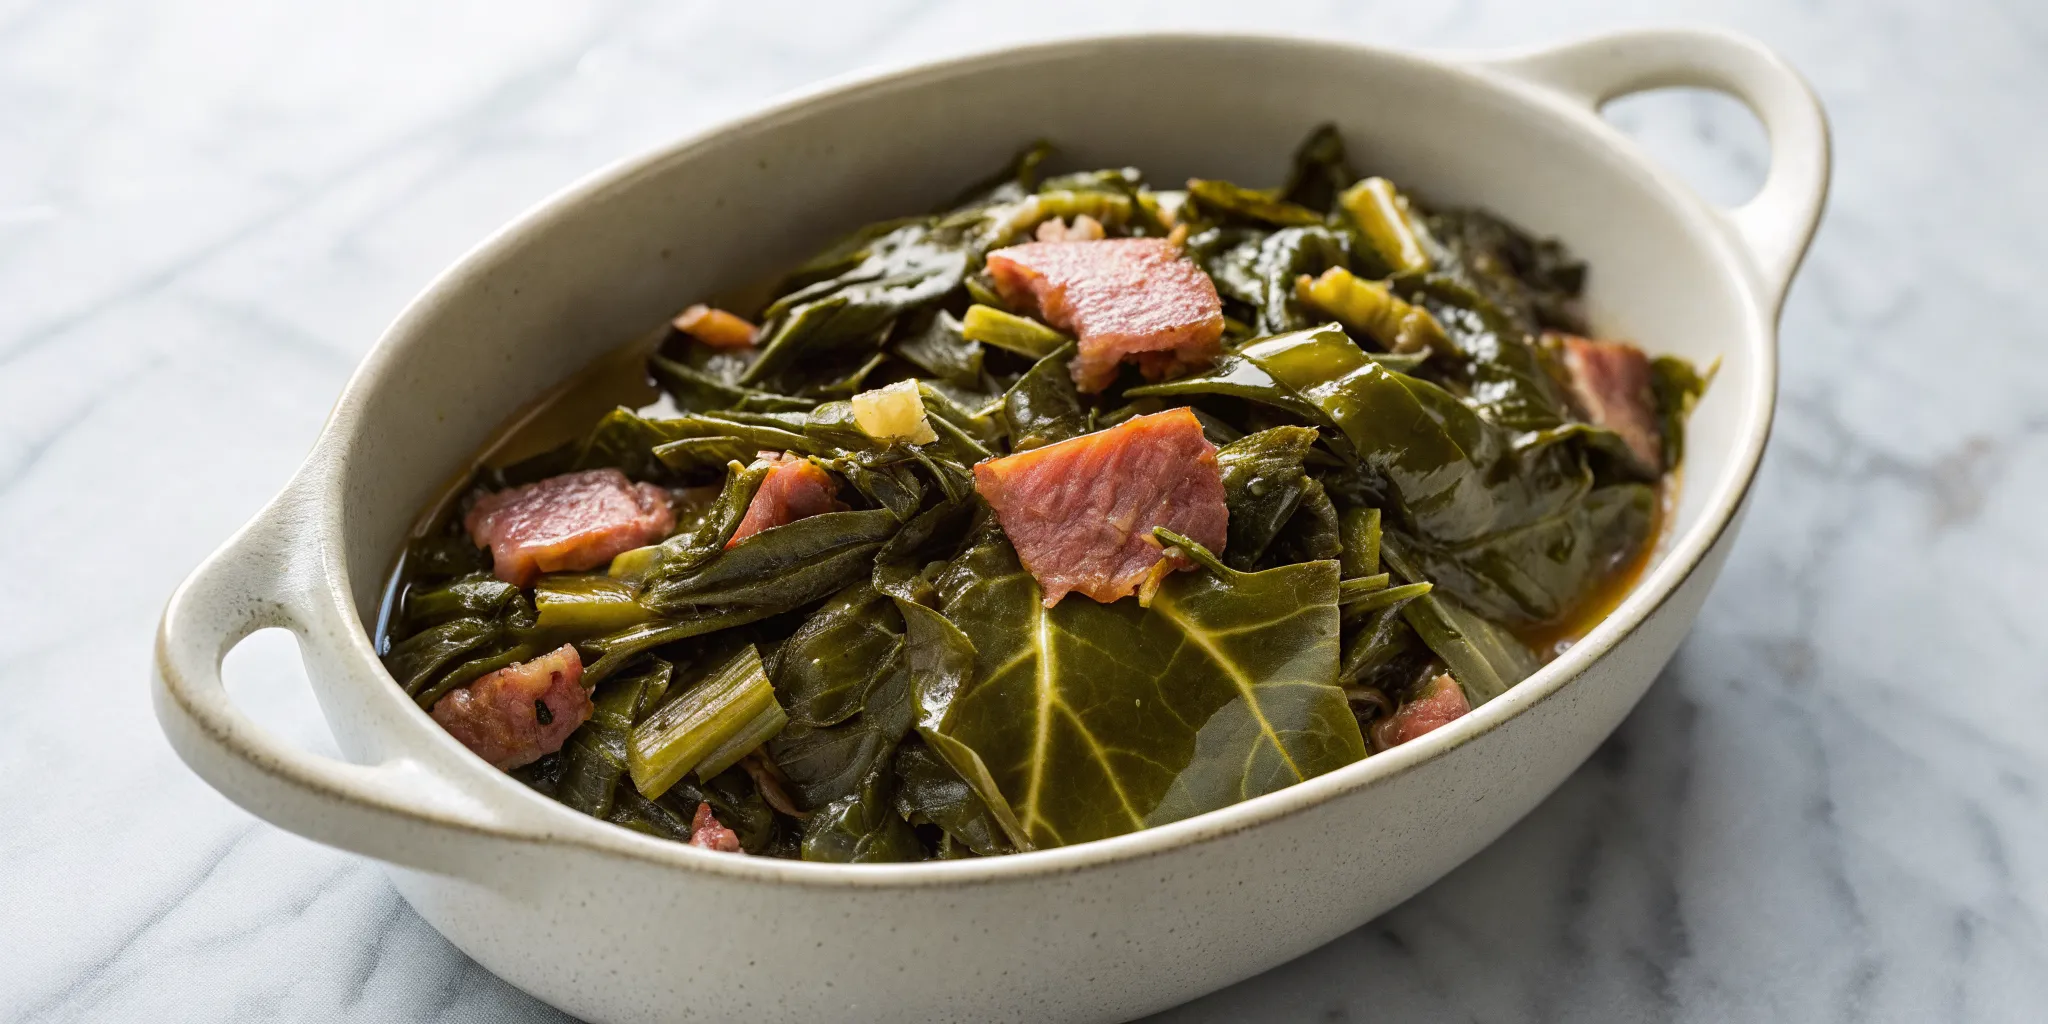
Collard greens are so much more than just a side dish here in the South; they’re a taste of history and tradition served up in a bowl. They tell a story of resilience, family gatherings, and the simple joy of a shared meal. Making them is a way to connect with that rich heritage. The process itself, from simmering the meat to create a savory potlikker to slowly tenderizing the leaves, is a time-honored ritual. In this guide, we’ll honor that tradition by showing you the classic way to prepare southern style collard greens with ham hocks, creating a dish that’s good for the body and the soul.
Key Takeaways
- Start with a superior clean for better taste: To avoid gritty greens and reduce bitterness, always wash your leaves multiple times. Soaking them in a water and vinegar solution is a simple trick that makes a huge difference in the final dish.
- Embrace the low and slow simmer for rich flavor: The secret to tender, soulful greens is patience. Let them cook for at least two hours in a savory broth, usually started with ham hocks, to allow the flavors to fully develop.
- Finish with a final flavor adjustment: Just before serving, balance the rich, smoky notes with a touch of acid and sweetness. A tiny pinch of sugar or a splash of vinegar can brighten the entire pot and make the flavors pop.
What Are Collard Greens? A Southern Staple Explained
If you’ve spent any time in the South, you know collard greens are more than just a leafy vegetable. They’re a cornerstone of Southern cooking, a dish that shows up at Sunday dinners, holiday feasts, and just about any gathering that calls for true comfort food. But what makes them so special? Collards are part of the cabbage family, known for their sturdy leaves and slightly bitter taste that transforms into something rich and savory when slow-cooked. Here at Notch8, we know a good pot of greens is essential to any Southern meal. They carry stories in every bite, connecting us to history, family, and the simple joy of a well-made dish.
More Than a Side Dish: Cultural Roots and Traditions
Collard greens hold a story that’s deeply woven into the fabric of American history. Their journey to the Southern table is a powerful one, with roots in African American heritage. During times of enslavement, collard greens were one of the few vegetables that enslaved people were permitted to grow and harvest for their own families. This made them a vital source of nourishment and a symbol of resilience and self-sufficiency. This tradition of cultivating and cooking collards became a cornerstone of soul food, passed down through generations. So, when you enjoy a bowl of greens, you’re partaking in a taste of history.
Good for the Soul (and Your Body, Too)
We all know that a perfectly seasoned pot of collard greens is pure comfort food. It’s the kind of dish that warms you from the inside out. But did you know they’re also incredibly good for you? Collard greens are a nutritional powerhouse, often called a superfood for good reason. They are packed with essential nutrients like Vitamin K (great for bone health), fiber, iron, and plenty of antioxidants. Eating them regularly can support your overall health in so many ways. It’s not often that something so comforting and delicious is also working hard to keep you healthy, but that’s the magic of collard greens. They truly are good for the body and the soul.
Your Shopping List for Southern-Style Collard Greens
Great collard greens start with great ingredients. Before you even think about turning on the stove, a trip to the grocery store is in order. Getting this part right is half the battle, and it’s what separates good greens from the kind of unforgettable, soul-soothing dish we serve right here at Notch8 Carolina Kitchen. Don’t worry, the list is simple, and I’ll walk you through exactly what to look for to build that perfect pot of greens. We'll cover everything from the fresh produce to the smoky, savory meat that gives them their signature flavor. Think of this as your roadmap to creating a truly authentic Southern side dish that will have everyone asking for seconds.
How to Pick the Best Fresh Collard Greens
When you’re in the produce aisle, look for collard greens with vibrant, dark green leaves and firm stems. You’ll want to skip any bunches that look wilted, have yellowing spots, or feel flimsy. Since collards grow in sandy soil, they can be pretty gritty. A good wash is essential. You might need to rinse the leaves several times in a clean sink of cold water until the water runs completely clear. It’s a little extra work, but trust me, nobody wants sandy greens. Taking the time to select and clean them properly sets the stage for a delicious outcome.
Finding the Right Ham Hocks for Flavor
The secret to deeply savory collard greens is a smoky, salty piece of meat simmering in the pot, and ham hocks are the traditional choice for a reason. A ham hock is the lower part of a pig’s leg, and it’s mostly bone, fat, and connective tissue. It’s not there for its meatiness; it’s there to release all its rich, smoky flavor into the cooking liquid, which is what we call potlikker. If you can’t find ham hocks, don’t stress. You can get a similar result with smoked turkey wings or necks, salt pork, or a few slices of thick-cut bacon.
The Spices and Aromatics You Can't Skip
Beyond the greens and the meat, a few key ingredients create the flavor base. You’ll definitely need some chopped onion and minced garlic to start things off. For seasoning, a good Creole spice blend adds the perfect amount of warmth and complexity. Many Southern cooks also add a pinch of sugar to help balance any bitterness from the greens. The real magic happens during the cooking process, as the greens need a slow simmer to soften and absorb all that rich, smoky flavor from the ham hocks and spices. A splash of vinegar or hot sauce at the end brightens everything up beautifully.
How to Prep Your Collard Greens
Before you even think about turning on the stove, the most important work for making incredible collard greens happens at the sink and cutting board. Proper prep is the secret that separates okay greens from the tender, flavorful, grit-free greens everyone raves about. Taking a little extra time here makes all the difference in the final dish. It’s a non-negotiable step for achieving that classic Southern texture and taste. Let’s walk through how to get your greens perfectly clean and ready for the pot.
Wash Them Right: Getting Rid of All the Grit
Nothing ruins a bite of collards faster than a sandy crunch. Fresh greens can hold onto a surprising amount of dirt, so a quick rinse won’t cut it. You need to wash them thoroughly, and probably more than once. Fill your kitchen sink with cold water, submerge the leaves, and swish them around vigorously. Drain the water and repeat the process until you no longer see any sediment at the bottom of the sink. For an extra step that cleans the greens and tames their natural bitterness, try a vinegar soak. Soaking them in a mixture of water and a splash of apple cider vinegar for about 15 minutes helps make them even cleaner and brighter.
The Best Way to De-Stem and Chop Your Greens
Once your greens are clean, it’s time to deal with the stems. The thick, fibrous stem running down the center of each leaf is too tough to eat and won’t break down during cooking. The easiest way to remove it is to fold the leaf in half lengthwise and slice the stem right off. After de-stemming a good pile of leaves, stack them on top of each other, roll the stack up tightly like a cigar, and slice it into thin ribbons. This chiffonade technique makes quick work of a big batch. To make the pieces more bite-sized, you can then run your knife through the ribbons a few times in the other direction.
How to Cook Collard Greens: A Step-by-Step Guide
Alright, your greens are prepped and you’re ready to get cooking. This is where the magic happens. Making truly great collard greens isn’t complicated, but it does require a little patience. Follow these steps, and you’ll have a pot of greens that tastes like it came straight from a Southern grandma’s kitchen. If you'd rather skip the work, you can always come visit us at Notch8 for a taste of our classic recipe.
Start with the Ham Hocks
The deep, smoky flavor of classic collard greens comes from the meat, so we’ll start there. Place your ham hocks in a large stockpot or Dutch oven and cover them with chicken broth or water. Bring the liquid to a boil, then reduce the heat to a gentle simmer. Let them cook for about an hour on their own. This step does two important things: it starts to tenderize the meat so it falls off the bone later, and it creates a rich, savory broth, or "pot likker," that will become the foundation for your greens. This dish is a cornerstone of Southern and African American cooking, so giving the ham hocks a head start is key.
Create Your Flavor Base
Once the ham hocks have had time to work their magic, it’s time to build your layers of flavor. Add your chopped onion and minced garlic to the pot, letting them soften in the savory broth. This is also the time to add your seasonings. A good Creole seasoning blend works wonders here, along with a pinch of red pepper flakes for a little warmth. This method of using salted meat to flavor vegetables has deep roots, stemming from a time when enslaved people used less desirable cuts of pork to make simple greens delicious. It’s a technique that transforms humble ingredients into something truly special.
The Secret to a Perfect, Slow Simmer
Now for the main event. Add your clean, chopped collard greens to the pot. It might look like a mountain of greens at first, but don’t worry, they’ll cook down significantly. Stir everything together, make sure the greens are mostly submerged in the broth, and put the lid on. The real secret here is a long, slow simmer. Let the greens cook for at least two hours, stirring occasionally. This gives the tough leaves plenty of time to become silky and tender while soaking up all that deep, smoky flavor from the ham hocks. If you like your greens extra soft, you can even let them go for three hours. Patience is your best friend here.
Pro Tips for the Best Flavor (and Less Bitterness)
Anyone can follow a recipe, but the real magic in Southern cooking comes from the little tricks passed down through generations. Collard greens can sometimes have a bitter edge, but with a few simple techniques, you can ensure every bite is rich, savory, and perfectly balanced. These are the small steps that take your greens from good to unforgettable, just like the ones you’ll find on our menu. Here’s how to get that perfect flavor at home.
The Vinegar Trick for Cleaner, Tastier Greens
Before you even think about cooking, give your greens a good soak in a mixture of water and apple cider vinegar. This isn't just about getting them clean, though it does an excellent job of that. The vinegar bath is a crucial step for two reasons. First, it helps break down some of the natural bitterness inherent in the leaves. Second, it actually brightens their color, making them a more vibrant, appealing green in the finished dish. Don't skip this part; it’s a simple method for preparing greens that lays the foundation for a truly delicious pot.
Strike the Perfect Balance of Sweet and Tangy
If you’ve simmered your greens and they still taste a little sharp, don’t worry. The fix is likely already in your pantry. Adding a tiny pinch of sugar is a time-honored Southern secret for balancing out any lingering bitterness from the collards and the smokiness from the ham hocks. You’re not trying to make them sweet, just to round out the flavors. This small adjustment creates a more complex and enjoyable taste, enhancing the deep, savory notes of the dish. It’s a perfect example of how a little bit of sweetness can be used to balance flavors in savory cooking.
Finish with a Splash of Vinegar or Hot Sauce
Just before you bring that big pot of greens to the table, give them one last flavor boost. A quick splash of apple cider vinegar or a few dashes of your favorite hot sauce can work wonders. This final touch of acid brightens up all the rich, slow-simmered flavors, cutting through the fat from the ham hock and making every ingredient pop. It adds a delightful tang that complements the earthy greens perfectly. This is how you add that final, signature kick that will have everyone asking for your secret.
How Long Does It Take to Get Tender Collard Greens?
Patience is the secret ingredient for truly great collard greens. If you’re wondering how long it takes to get that perfect, melt-in-your-mouth texture, plan on a slow simmer. For tender greens that have soaked up all the smoky goodness from the ham hocks, you’ll want to let them cook for about two hours. If you like your greens exceptionally soft, you can let them go for three hours or even a little longer. It really comes down to personal preference. Some folks enjoy a bit more bite, so they might pull them off the heat a little sooner.
The long cooking time isn't just about softening the leaves; it's about building layers of flavor. As the greens gently bubble away, they absorb the rich, savory notes of the ham hock and the aromatic spices in the pot liquor. This slow-and-low method is what transforms a simple leafy green into a soulful Southern classic. Of course, if you're short on time but craving authentic flavor, you can always skip the wait and order a side from our kitchen. We’ve already done the simmering for you.
Why Low and Slow Is the Way to Go
The tradition of cooking collard greens for hours has deep roots. Using salted meats like ham hocks to flavor vegetables was a resourceful way to make the most of every ingredient. This method not only adds incredible taste but also requires a slow cooking process to render the fat and soften the meat, infusing the entire pot with a rich, smoky flavor. This gentle simmer is essential for breaking down the tough fibers in the collard leaves, making them tender and delicious. It’s a culinary tradition that turns humble ingredients into something truly special.
How to Know When They're Perfectly Done
When you first pile fresh collard greens into your pot, it might look like you have way too many. Don't worry, they cook down a lot. The best way to know when your greens are ready is by their texture. They should be perfectly tender when you take a bite. Feel free to taste them as they cook to get them just right for your preference. Once they’re done, you can enjoy them right away. If you have leftovers, they’ll keep in the fridge for three to four days. In fact, many people swear they taste even better the next day.
What to Serve with Collard Greens
Collard greens are a star, but every star needs a great supporting cast. The right pairings can turn a simple side of greens into a memorable Southern meal that feels like a warm hug. Whether you’re aiming for a classic weeknight dinner or a full-on celebratory feast, thinking about what goes next to your greens on the plate is key. It’s all about creating a balance of flavors and textures that sing together. From the essentials you can’t skip to building a plate piled high with comfort, we’ve got you covered.
Classic Pairings: Don't Forget the Cornbread
If collard greens have a soulmate, it’s cornbread. This isn't just a suggestion; it's practically a requirement for the full experience. A slightly sweet, crumbly piece of cornbread is the perfect tool for sopping up every last drop of that savory, smoky potlikker at the bottom of your bowl. It’s a pairing that’s been perfected over generations. For an extra layer of flavor, serve your greens with a bottle of vinegar pepper sauce on the side for a tangy kick and some finely chopped raw onion for a sharp bite. It’s the simple, traditional way to enjoy a bowl of Southern-style greens.
How to Build a Complete Southern Meal
Ready to build a full plate? Collard greens are a team player and fit right in with all the Southern all-stars. They are fantastic alongside crispy Southern Fried Chicken, creamy Mac & Cheese, or sweet Candied Yams. For a truly classic combination, serve them with Black-Eyed Peas. In fact, a plate loaded with greens, black-eyed peas, pork, and cornbread is a New Year's tradition for many, thought to bring good fortune in the year ahead. It’s the kind of meal that doesn’t just fill you up; it feeds your soul. At Notch8, you can find many of these classic pairings on our menu to build your own perfect comfort food plate.
How to Store and Reheat Leftover Greens
One of the best parts about making a big pot of collard greens is that the leftovers often taste even better the next day. As the greens sit, the flavors meld together, becoming deeper and richer. But to make sure they’re just as good on day two (or three), you need to store and reheat them correctly. It’s simple to do and makes a world of difference in preserving that perfect texture and taste you worked so hard to create.
Whether you plan on eating them tomorrow or next month, proper storage is key. Your two main options are the refrigerator for short-term enjoyment or the freezer if you want to save a batch for a later date. Both methods work beautifully, so you can enjoy your Southern-style greens whenever the craving hits. If you're not in the mood for leftovers, you can always visit us at Notch8 for a fresh plate.
Storing Leftovers: Fridge vs. Freezer
If you know you’ll be finishing your collard greens within a few days, the refrigerator is your best bet. First, let the greens cool down to room temperature. Storing them while they’re still hot can create condensation, making them watery. Once cooled, transfer the greens and their pot likker into an airtight container. They’ll stay fresh and delicious in the fridge for about three to five days.
For longer storage, the freezer is an excellent option. Follow the same process of cooling the greens completely, then pack them into freezer-safe bags or containers. Try to press out as much air as possible to prevent freezer burn. Properly stored, your collards will keep for up to three months, giving you a great way to preserve your food for a future meal.
The Best Way to Reheat Without Losing Flavor
When you’re ready to enjoy your leftovers, the goal is to warm them gently without cooking them further. The best way to do this is on the stovetop. Place the greens in a small pot or saucepan over low heat. If they seem a little dry, add a splash of chicken broth, water, or some of that reserved pot likker to bring back some moisture. Stir occasionally until they are warmed through. This slow-and-steady method helps maintain their tender texture and rich flavor.
While you can use a microwave in a pinch, be careful not to overdo it. Heat the greens in short 30-second intervals, stirring in between, until they reach the desired temperature. Overheating in the microwave can make them tough and ruin the texture.
Common Collard Green Mistakes to Avoid
Making truly great collard greens is an art, but it’s one you can definitely master. Most of the time, when a batch doesn't turn out quite right, it comes down to a few simple, avoidable errors. Getting the prep work and the cooking time just right can make all the difference between a pot of greens that’s good and one that’s unforgettable.
Think of it this way: the love you put in at the beginning and the patience you show during the simmer are the real secret ingredients. If your greens have ever been too gritty, too tough, or just a little bland, don't worry. We're going to walk through the most common missteps so you can serve up a perfect pot of greens every single time. Ready to leave those mistakes behind? Let's get to it.
Don't Rush the Prep Work
The fastest way to ruin a perfectly good pot of collards is by not cleaning them properly. Fresh greens come straight from the field, and they can hide a surprising amount of sand and grit between their leaves. You absolutely have to wash them thoroughly, rinsing them several times until the water runs completely clear. A single bite of sandy greens is enough to make you wish you’d spent an extra five minutes at the sink. For an even better clean, try soaking them in apple cider vinegar and water. This not only helps dislodge stubborn dirt but also brightens their color and helps cut through any natural bitterness.
The Pitfalls of Overcooking and Underseasoning
Finding the right texture for your collards is a matter of personal taste, but mushy, overcooked greens are never the goal. The key is a low, slow simmer. Cooking them for about two hours usually results in tender greens that still have a bit of body. If you prefer them exceptionally soft, you can let them go for three hours or more. Just keep an eye on them. On the flip side, underseasoning is just as big a problem. Collards need bold flavors to stand up to. The rich, smoky broth, or pot likker, is where the magic happens. Don't be shy with your aromatics, and be sure to taste and adjust the seasoning as you go.
Putting Your Own Spin on a Classic
Once you’ve mastered the classic Southern collard greens recipe, you can start having some fun with it. Think of the traditional recipe as your foundation. From there, you can swap out ingredients or try new cooking methods to perfectly suit your taste and your schedule. A few simple changes can make the dish feel entirely new while still delivering that soulful comfort you crave. After all, the best recipes are the ones that become a part of your own family's story.
Whether you’re looking for a different smoky flavor or need a cooking method that fits a busy weeknight, there are plenty of ways to make this classic your own. Don’t be afraid to experiment. You might just discover your new favorite way to make greens, creating a tradition that you can pass down. Here are a couple of easy ideas to get you started on your culinary adventure.
Beyond Ham Hocks: Other Meats to Try
While ham hocks are the go-to for that deep, smoky flavor, they aren’t the only option. If you can’t find them or just want to try something different, you have plenty of choices. Smoked turkey, especially wings or legs, offers a similar savory depth with a slightly leaner profile, making it a popular alternative.
You can also use salt pork, country ham, or even thick-cut bacon to build your flavor base. These are all excellent substitutes that bring their own unique character to the pot. Bacon, for instance, will add a distinct smokiness that pairs beautifully with the earthy greens. Feel free to play around and see which one you like best.
Modern Methods: Using an Instant Pot or Slow Cooker
The traditional low-and-slow simmer on the stovetop is fantastic, but let’s be real, you don’t always have hours to spare. For a quicker version, try adapting your collard greens recipe for an Instant Pot. You can get perfectly tender greens in about 25 minutes with a little less broth, making it a total game-changer for weeknight dinners.
If you have more time and want a hands-off approach, the slow cooker is your best friend. Just add your ingredients in the morning and let them simmer all day. The flavors will meld together beautifully over several hours. The best part? Greens taste even better the next day, so you can make a big batch and enjoy them for a few days.
Related Articles
- The Best Southern Style Collard Greens Recipe — Notch8 Carolina Kitchen
- How to Make Authentic Collard Greens Southern Style — Notch8 Carolina Kitchen
Frequently Asked Questions
Why are my collard greens still bitter after cooking? Bitterness can happen, but it’s usually easy to fix. The best defense is a good offense, so start by soaking your raw, clean greens in a mix of water and apple cider vinegar before cooking. This simple step helps tame their sharp flavor from the very beginning. If you've finished cooking and they still taste a bit harsh, try adding a tiny pinch of sugar. This won't make them sweet, but it will balance the flavors and cut through any lingering bitterness.
Can I make this recipe vegetarian? Absolutely. The key to great greens is a deep, savory broth, which you can create without meat. Instead of using ham hocks, build your flavor base with a quality vegetable broth. To get that classic smoky taste, add a teaspoon of smoked paprika or a few drops of liquid smoke to the pot along with your onions and garlic. A slow simmer will allow the greens to absorb all that rich, smoky flavor, giving you a delicious vegetarian version.
What exactly is "potlikker" and why is it so important? Potlikker (sometimes spelled pot liquor) is the flavorful, nutrient-rich broth left in the pot after the collard greens have finished cooking. It’s a concentrated liquid infused with the smoky essence of the ham hock, the aromatics, and the earthy taste of the greens themselves. It’s considered liquid gold in Southern cooking because it’s packed with flavor. The best way to enjoy it is by sopping it up with a piece of cornbread.
Is it okay to use frozen collard greens instead of fresh ones? Yes, you can definitely use frozen collard greens if you're short on time. The biggest advantage is that they come pre-washed and chopped, which saves you a lot of prep work. Just be aware that the final texture might be a bit softer than what you'd get with fresh greens. You can add them directly to the pot from the freezer, but you may need to adjust your cooking time slightly.
My greens came out tough. What did I do wrong? Tough greens are almost always a result of not cooking them long enough. Collards are a sturdy vegetable with fibrous leaves that need time to break down and become tender. The secret is a low and slow simmer. Make sure your greens cook for at least two hours, though three is even better if you like them exceptionally soft. Rushing the process with high heat will only make them tougher, so patience is truly your most important ingredient.